Note: This is the first of a series of articles coming over the next few days about the Battle of Midway, a major turning point of the Second World War.
 The Battleship Yamato, Flagship of the Combined Fleet and symbol of Japanese Naval Power
The Imperial Japanese Navy under the command of Admiral Isoruku Yamamoto had been humiliated. On April 18th 1942 16 B-25 bombers under the command of Colonel Jimmy Doolittle were launched from the deck of the USS Hornet and bombed Tokyo. Though the physical damage was insignificant the psychological impact was massive on the Japanese military establishment. Yamamoto and his deputy Rear Admiral Matome Ugaki had explored the possibility of attacking Midway in the early months of 1942 as the Japanese armed forces competed with each other to determine an overall strategy for the war effort. The Army was insistent on a China strategy while the Navy preferred expansion in the Western, South and Central Pacific. Yamamoto’s idea envisioned seizing Midway and using it as a forward base from which an invasion of Hawaii could be mounted as well as the bait to draw the carrier task forces of the U.S. Navy into battle and destroy them.
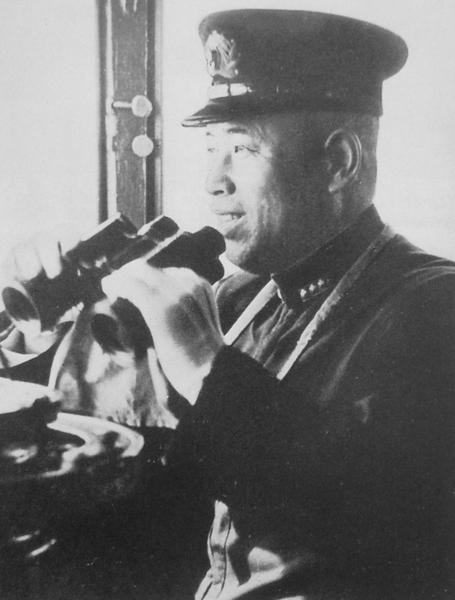
 Admiral Isoruku Yamamoto, CinC Combined Fleet
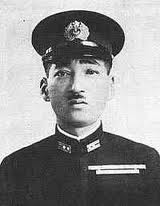
The Japanese certainly had the forces to accomplish the mission outnumbering the U.S. Navy which had taken heavy losses at Pearl Harbor and in the Far East. Following the Doolittle raid Yamamoto went ahead with the plan to invade Midway. The operation, named MI was coupled with an invasion of the islands of Attu and Kiska in the Aleutians which would form a picket line to prevent future attacks on the Japanese mainland.  Fuchida
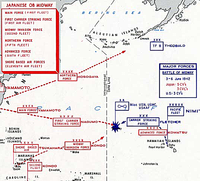
Yamamoto’s plan was not without its critics, the majority of the Staf of the First Air Fleet embarked on the First Carrier Striking Force was not in favor including the leader of the Pearl Harbor attack Commander Mitsuo Fuchida who considered it “grammar school strategy.” Despite objections from them as well as his Fleet Operations Officer Yamamoto directed that the plan be implemented. The plan was to have the First Carrier Striking Force attack Midway and reduce its defenses so that the Invasion Force could undertake the task of invading and occupying Midway. Supporting these forces was the Main Body built around Battleship Division One included Yamamoto’s flagship the 72,000 ton behemoth Yamato. Another strong force was assigned to the Aleutian operation. The task forces were spread out across the North Pacific and would not able to provide mutual support to each other in a timely manner.
Japanese Forces were organized in the following manner.
Main Body, Admiral Yamamoto
BatDiv 1, Admiral Yamamoto
BB Yamato (flagship, Yamato), Captain
BB Nagato (Nagato), Captain Hideo Yano
BB Mutsu (Nagato), Captain Teijiro Yamazumi
Carrier Group, Captain Kaoru Umetani
CVL Hosho (Hosho), Captain Umetani
Air Unit (8 bombers), Lieutenant Yoshiaki Irikiin
DD Yukaze (Minekaze), Lieutenant Commander Shizuka Kajimoto
Special Force, Captain Kaku Harada
Chiyoda (seaplane carrier, Chitose), Captain Harada
Nisshin (seaplane carrier, Nisshin), Captain Katsumi Komazawa
Screen (DesRon 3), RADM Shintaro Hashimoto
CL Sendai (flagship, Jintsu), Captain Nobue Morishita
DesDiv 11, Captain Kiichiro Shoji
DD Fubuki (Fubuki), Captain Shizuo Yamashita
DD Shirayuki (Fubuki), Captain Taro Sugahara
DD Hatsuyuki (Fubuki), Captain Lieutenant Commander Junnari Kamiura
DD Murakumo (Fubuki), Captain Commander Hideo Higashi
DesDiv 19, Captain Ranji Oe
DD Isonami (Fubuki), Commander Ryokichi Sugama
DD Uranami (Fubuki), Commander Tsutomu Hagio
DD Shikinami (Fubuki), Commander Akifumi Kawahashi
DD Ayanami (Fubuki), Commander Eiji Sakuma
1st Supply Unit, Captain Shigeyasu Nishioka
Naruto (Oiler), Captain Nishioka
Toei Maru (Oiler)
It was Yamamoto’s plan to use this force to polish off U.S. Forces that would only enter the fight after he had taken Midway. Despite the success of his carrier task forces at his heart Yamamoto was still a Battleship Sailor and believed that his battleships would be the deciding factor in the final destruction of the U.S. Navy forces in the Pacific. This force could be augmented by the Aleutian Guard Force, detached from the Main Body under the command of Vice Admiral Shiru Takasu and was composed of the following fleet units:
GUARD (Aleutians Screening) FORCE, VADM Shiro Takasu in Hyuga
Chief of Staff, Rear Admiral Kengo Kobayashi
BatDiv 2
BB Hyuga (flagship, Hyuga), Captain Chiaki Matsuda
BB Ise (Hyuga), Captain Isamu Takeda
BB Fuso (Fuso), Captain Mitsuo Kinoshita
BB Yamashiro (Fuso), Captain Gunji Kogure
Screen, RADM Fukuji Kishi
CruDiv 9, Rear Admiral Kishi
CL Kitakami ( flagship, Kuma), Captain Saiji Norimitsu
CL Oi (Kuma), Captain Shigeru Narita
DesDiv 20, Captain Yuji Yamada
DD Asagiri (Fubuki), Commander Nisaburo Maekawa
DD Yugiri (Fubuki), Captain Masayoshi Motokura
DD Shirakumo (Fubuki), Commander Toyoji Hitomi
DD Amagiri (Fubuki), Captain Buichi Ashida
DesDiv 24, Captain Yasuji Hirai
DD Umikaze (Shiratsuyu), Commander Nagahide Sugitani
DD Yamakaze (Shiratsuyu), Commander Shuichi Hamanaka
DD Kawakaze (Shiratsuyu), Commander Kazuo Wakabayashi
DD Suzukaze (Shiratsuyu), Commander Kazuo Shibayama
DesDiv 27, Captain Matake Yoshimura
DD Ariake (Hatsuharu), Commander Shoichi Yoshida
DD Yugure (Hatsuharu), Commander Kiyoshi Kamo
DD Shigure (Shiratsuyu), Commander Noboru Seo
DD Shiratsuyu (Shiratsuyu), Lieutenant Commander Kimmatsu Hashimoto
2nd Supply Unit, Captain Matsuo Eguchi
San Clemente Maru (oiler), Captain Eguchi
The force that was the true heart of the Japanese Navy in early 1942 was the First Carrier Striking Force which at Pearl Harbor and in the months following had run roughshod over all Allied opposition. Initially composed of 6 flattops the force was reduced to four when the Shokaku was heavily damaged and Zuikaku’s air group decimated at the Battle of the Coral Sea on 8 May 1942. Nevertheless it was still a formidable and experienced force in its own right. Commanded by Vice Admiral Chuichi Nagumo it was composed of the following units:
FIRST CARRIER STRIKING FORCE (1st Air Fleet), VADM Chuichi Nagumo
Carrier Group, VADM Nagumo
CarDiv 1
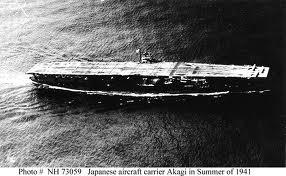
CV Akagi (flagship, Akagi) 21 Zero fighters, 21 dive bombers, 21 torpedo bombers
CV Kaga (Kaga) 21 Zero fighters, 21 dive bombers, 30 torpedo bombers
CarDiv 2 — RADM Tamon Yamaguchi
CV Hiryu (flagship, Hiryu) 21 Zero fighters, 21 dive bombers, 21 torpedo bombers
CV Soryu (Hiryu) 21 Zero fighters, 21 dive bombers, 21 torpedo bombers
Support Group — RADM Hiroaki Abe CruDiv 8
CA Tone (flagship, Tone)
CA Chikuma (Tone)
2nd Section, BatDiv 3 —
BB Haruna (Kongo)
BB Kirishima (Kongo)
Screen (DesRon 10) — RADM Susumu Kimura
CL Nagara (flagship, Nagara)
DesDiv 4 — 4 DDs
DesDiv 10 — 3 DDs
DesDiv 17 — 4 DDs
Supply Group — 5 oilers, 1 DD
The Invasion Force under the command of Vice Admiral Nobutake Kondo was a formidable surface strike group in its own right and was built around 2 Fast Battleships, 9 Heavy Cruisers and a light carrier.
MIDWAY INVASION FORCE, (2nd Fleet), VADM Nobutake Kondo
Invasion Force Main Body
CruDiv 4 (less 2nd section)
CA Atago (flagship, Takao),
CA Chokai (Takao)
CruDiv 5 (less 2nd section)
CA Myoko (Myoko)
CA Haguro (Myoko)
BatDiv 3 (less 2nd section) —
BB Kongo (Kongo)
BB Hiei (Kongo)
Screen (DesRon 4) — RADM Shoji Nishimura
CL Yura (flagship, Nagara)
DesDiv 2 — 4 DDs
DesDiv 9 — 3 DDs
Carrier Group Zuiho (CVL) — 12 Zero fighters, 12 torpedo bombers; 1 DD
Supply Group — 4 oilers, 1 repair ship
Close Support Group — VADM Takeo Kurita
CruDiv 7
CA Kumano (flagship, Mogami)
CA Suzuya (Mogami)
CA Mikuma (Mogami)
CA Mogami (Mogami)
DesDiv 8 — 2 DDs 1 oiler
Transport Group — RADM Raizo Tanaka
12 transports carrying troops
3 patrol boats carrying troops
1 oiler
Escort (DesRon 2) — RADM Tanaka
CL Jintsu (flagship, Jintsu)
DesDiv 15 — 2 DDs
DesDiv 16 — 4 DDs
DesDiv 18 — 4 DDs
Seaplane Tender Group — RADM Riutaro Fujita
Seaplane Tender Div 11
Chitose (CVS) — 16 fighter seaplanes, 4 scout planes
Kamikawa Maru (AV) — 8 fighter seaplanes, 4 scout planes
1 DD;
1 patrol boat carrying troops
Minesweeper Group
4 minesweepers
3 submarine chasers
1 supply ship
2 cargo ships
The Northern Force which was assigned to the invasion and occupation of Attu and Kiska was commanded by Vice Admiral Moshiru Hosogaya included the carriers Ryujo and Junyo which had they accompanied the First Carrier Striking Force might have given the Japanese the edge that they would have needed to recover when that force was destroyed on June 4th. This force was composed of the following units:
NORTHERN (Aleutians) FORCE (5th Fleet) — VADM Moshiro Hosogaya
Northern Force Main Body
CA Nachi (flagship, Myoko)
Screen —
2 DDs
Supply Group —
2 oilers, 3 cargo ships
Second Carrier Striking Force — RADM Kakuji Kakuta
Carrier Group (CarDiv 4)
CVL Ryujo (flagship, Ryujo) — 16 Zero fighters, 21 torpedo bombers
CV Junyo (Junyo) — 24 Zero fighters, 21 torpedo bombers
Support Group (2nd section, CruDiv 4) —
CA Maya (Takao)
CA Takao (Takao)
Screen (DesDiv 7) —
3 DDs
1 oiler
Attu Invasion Force — RADM Sentaro Omori
CL Abukuma (flagship, Nagara)
DesDiv 21 —
4 DDs
1 minelayer
1 transport carrying troops
Kiska Invasion Force — Capt. Takeji Ono
CruDiv 21 —
CL Kiso
CL Tama
AMC Asaka Maru (auxiliary cruiser)
Screen (DesDiv 6) —
3 DDs
2 transports carrying troops
Minesweeper Div. 13 —
3 minesweepers
Submarine Detachment — RADM Shigeaki Yamazaki
SubRon 1 — I-9 (flagship)
SubDiv 2 — 3 submarines
SubDiv 4 — 2 submarines
Note all Japanese Fleet information obtained online at http://www.microworks.net/pacific/orders_of_battle/midway_japan.htm
These forces were augmented by a submarine screening force and land based naval air forces stationed at Wake and Kwajalein.
The plan was complicated and depended on the Americans reacting exactly as the plan anticipated them doing. Yamamoto never expected that the Americans would be waiting for his forces and had knowledge of his plans due to the efforts of U.S. Navy code breakers under the direction of Commander Joseph Rochefort and the Fleet Intelligence Officer Captain Edwin Layton had broken the top secret Japanese Navy JN-25 Code. Thus despite the massive amount of forces involved the plan was seriously flawed and left the advanced forces vulnerable to unexpected American moves.
Next: Calculated Risk: The American Forces and Strategy at Midway


Hmm, I don’t seem to be getting my posts through. Good stuff, Padre, and an interesting new site to check out!
Padre- Is this a new site, or an old one being rebuilt? It’s got a few holes and missing/broken links. Just curious if you knew the history, before I go blindly offering help to a potentially sinking ship (pardon the comparison).
John
Same site.Your posts are coming through here. Maybe WordPress is acting up.
Blessings
Steve+
John
They are showing up on my end of the world..
Sorry for the delay I was on the road tonight.
Blessings
Steve+
John
There was a problem in the HTML coding. All is back to normal
Steve+
Thanks VERY much, Padre. I was having problems over the past couple days, as well. We lost power for over 6 hours Wednesday, which screwed up the wireless modem we use. Then, the Email I normally use just vanished for a few hours yesterday, followed by the wi-fi connection just locking up last night for over an hour. Quite an adventurous past couple of days. You know the old Chinese curse, “May you live in interesting times.” Well, the past few days have been MIGHTY interesting! 😉
I appreciate your patience. In all things, especially in my case.