Tag Archives: ijn mogami

Compounding Disaster: The Loss of the Mikuma at Midway

Mikuma as Built

Admiral Isoroku Yamamoto was still attempting to digest the calamity that had befallen Admiral Nagumo’s carrier task force. In the shocked atmosphere of the mighty Super Battleship Yamato’s command center the Staff of the Combined Fleet was hastily attempting to arrive at a solution which might reverse the disaster and bring victory.  Admiral Ugaki, Yamamoto’s Chief of Staff despite his personal doubts ordered Vice Admiral Nobutake Kondo to prepare for a night surface engagement with the US Fleet and to dispatch a strong surface force to bombard Midway in order to prevent the Americans from reinforcing it and to prevent its further use against his forces should the invasion move forward.  Kondo organized his fleet to attempt to find the American carriers and bring them to battle before dawn.

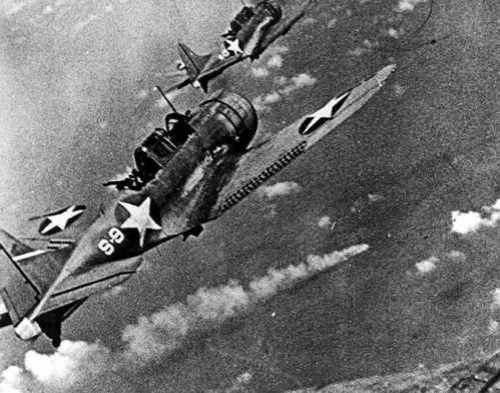
SBD Dauntless Dive Bombers from Hornet attacking Mogami and Mikuma 

Kondo detached Vice Admiral Takeo Kurita’s Close Support Group composed of Cruiser Seven, the fastest and most modern cruisers in the Imperial Navy proceed at full speed to attack Midway.  Kurita’s cruisers, the Kumano, Suzuya, Mikuma and Mogami were each armed with 10 8” guns and were escorted by the two destroyers.

Kurita’s force was 80 miles from Midway when Yamamoto realizing that his plan was unrealistic ordered Kondo’s forces to retreat and rendezvous with his main force shortly after midnight. The order was met with a measure of relief by most officers in the force and the force turned northwest and steamed at 28 knots to meet the Main Body.  At 0215 lookouts on Kumano sighted a submarine on the surface which turned out to be the USS Tambor which had been shadowing the group, and made a signal for the force to make a emergency 45 degree turn to port.

During the process Mogami’s Navigator took over from the watch to oversee the tricky maneuver. In doing so he thought that there was too much distance between him and the ship ahead, the Mikuma. So he adjusted his course to starboard and then realized his mistake. The ship he thought was Mikuma was actually Suzuya and Mikuma was directly ahead. As soon as he recognized his mistake Mogami’s Navigator ordered a hard turn to port and reversed the engines but it was too late. Mogami’s bow crashed into Mikuma’s port quarter. The impact caused minimal damage to Mikuma but Mogami was heavily damaged. She lost 40 feet of her bow and everything else was bent back to port at right angles to her number one turret.

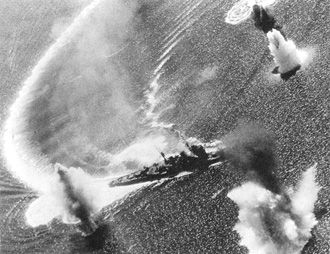
Ariel Photo of Mikuma damaged

Mogami’s damage control teams isolated the damage and worked the ship up to 12 knots. This was not fast enough for Kurita to make his rendezvous so he left Mikuma and the destroyers to escort Mogami while he steamed ahead with Kumano and Suzuya.

Mikuma adrift and sinking. The wreckage of Captain Fleming’s Vindicator can be seen on X- Turret 

Tambor’s skipper LCDR John W Murphy sent a contact report at 0300 reporting “many unidentified ships.” He followed this with more detailed information and the Americans on Midway began to launch its remaining serviceable aircraft to attack the threat. A flight of B-17 Bombers launched at 0430 could not find the Japanese ships but at 0630 a PBY Catalina found the Japanese and radioed Midway “two Japanese battleships streaming oil.”  The remaining 12 aircraft of VSMB-241 under command of Captain Marshall Tyler a mix of SBD Dauntless and SB2U Vindicators took off at 0700. His force attacked at 0808 scoring no hits but Captain Richard Fleming, his Vindicator on fire dropped his bomb and then crashed his aircraft into Mikuma’s after turret. The fire was sucked down air intakes into the starboard engine room with disastrous results. The engineers were suffocated by the smoke and fumes and Mikuma was greatly reduced in speed.

Close up shot of Mikuma with survivors visible 

The two ships limped northwest at 12 knots escorted by the destroyers and were unmolested through much of the day with the exception of an ineffective attack by the B-17s at 0830. The following morning the Dive Bombers of Enterprise and Hornet were at work and found the crippled Japanese ships. Waves over US Dive Bombers attacked the cruisers throughout the morning and into the afternoon. Mikuma was hit at least 5 times and secondary explosions of ammunition and torpedoes doomed the ship. Mogami was also heavily damaged but remained afloat while both destroyers received bomb damage.  At sunset the tough cruiser rolled over to port and sank into the Pacific. Mogami whose damage control teams had performed miracles to keep their ship afloat helped the destroyers rescue survivors from Mikuma.  Only 240 were rescued with 650 officers and sailors going down with the ship.

The action against the cruisers ended the combat operations at Midway. The Japanese ships were doomed by Yamamoto’s decision to try to salvage victory from defeat and the error of Mogami’s Navigator during the emergency turn when Kumano sighted Tambor. The only thing that kept the result from being total was the efficacy of Mogami’s damage control teams.  Mogami was out of the war for 10 months following repairs and conversion to an Aircraft Cruiser in which her aft turrets were removed to increase the number of float plane scouts that the ship could carry. She rejoined the fleet in April 1943 and was sunk following the Battle of the Surigao Strait on 25 October 1944.

The Mogami and Mikuma proved to be tough ships to sink. Unprotected by friendly aircraft they fought hard against the unopposed American Dive Bombers. They suffered massive damage from 500 and 1000 pound bombs, both direct hits and near misses. Mogami was saved by the skill of her damage control teams and the foresight of her Damage Control Officer to jettison her torpedoes so that they did not explode and compound the damage wrought by the American bombs.

For the Americans it was a fitting end to the Battle of Midway and revenge for the Battle of the Sunda Strait where Mikuma and Mogami sank the USS Houston.

Peace

Padre Steve+

3 Comments

Filed under History, Military, Navy Ships, US Navy, world war two in the pacific

Slaughter at Surigao: The Old Ladies get their Revenge

USS West Virginia at Surigao Strait

This is the third article of a series on the Battle of Leyte Gulf. The Battle of Surigao Strait was the third action of the Battle of Leyte Gulf which ended in the near annihilation of one of the two groups of the Japanese Southern Force. The battle was the last ever where battleships engaged each other in a surface action.  

The two task groups of the Japanese Southern Force passed the daylight hours of 24 October relatively unscathed despite an air attack that caused minor damage. The group commanded by Vice Admiral Shoji Nishimura comprised of the elderly Battleships Yamashiro and Fuso the Heavy Cruiser Mogami and four destroyers was leading the charge and was followed by that commanded by Vice Admiral Kiyohide Shima with the Heavy Cruisers Nachi and Ashigara, Light Cruiser Abukuma and four destroyers.

The mission of these two groups which were unable to coordinate their actions due to orders to maintain strict radio silence was to fight their way through the SurigaoStraitto assist the Central Force in destroying the USinvasion force in Leyte Gulf.  The mission was for all practical purposes a suicide mission, a naval “Charge of the Light Brigade” as they sailed into the Valley of Death against the Battle Line of the US 7th Fleet.

USS West Virginia  at Surigao

The Japanese Battleships had spent the majority of the war in home waters and had seen little action.  They had not been part of any of the great Japanese victories in 1941 and 1942 and they had not been blooded in the Solomons.  Instead the two elderly battlewagons passed the war conducting training in the inland sea.  They were no longer first line ships but the Japanese were desperate.  During the afternoon Admiral Nishimura received an accurate report from one of Mogami’s scout planes telling him exactly what he was up against yet he pushed on in the manner of a Samurai.

Yamashiro and Fuso

Facing him was a force built around the 6 old Battleships of Vice Admiral Jesse Oldendorf’s 7th Fleet Battle Line.  The Americans heavily outnumbered the Japanese, the Battleships West Virginia, California and Tennessee were the heart of the force. Fully modernized after Pearl Harbor they no longer resembled the ships that they were before the war. Equipped with the latest Mark 8 Fire Control radar they had the ability to put their 16” and 14” shells on target at ranges farther than anything that the Japanese could counter.  Joined by the less fully modernized Maryland, Mississippi and Pennsylvania, 4 Heavy Cruisers, 4 Light Cruisers, 28 Destroyers and 39 PT Boats the outnumbered the combined Japanese forces with sixteen 16” and forty eight 14” guns to twenty 14” guns on the antiquated Yamashiro and Fuso.  The disparity in lesser guns was just as stark, thirty five against twenty six 8” guns, and fifty one 6” guns against six 5.5 inch guns.  This massive imbalance didn’t count the nearly one hundred fifty 5” guns on theUS destroyers and as well as nearly 200 torpedo tubes.

Yamashiro and Shigure ride into the Valley of death

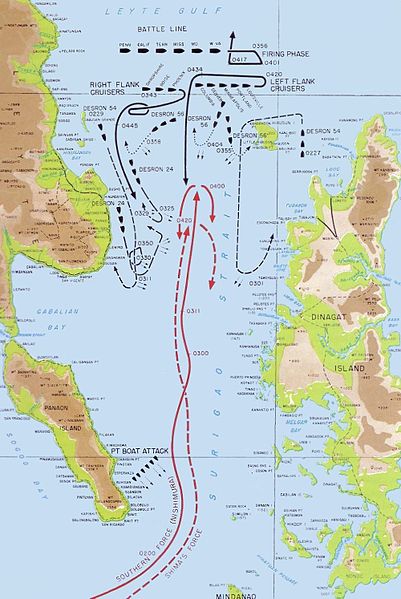
Nishimura’s force entered the southern entrance to Surigao Strait and was discovered by the American PT Boats at about 2236.  Though the PTs scored no hits they provided critical updates on the Japanese to Oldendorff.  At 0300 the American destroyers began a devastating series of attacks on the Japanese flanks.  They sank two destroyers and damaged another which had to turn back, but the real damage occurred when both Fuso and Yamashiro were hit. Fuso took two torpedoes fired by the destroyer USS Melvin.  She slowed and then blew up and broke in two sinking with all hands.  This account has been contested in recent years but many find the new version less believable than the first. Key in the evidence was the rescue and capture of Yamashiro’s Executive Officer in the north end of the strait and the surviving logs of the other Japanese ships which reported the sinking. Yamashiro though hit continued north with Mogami and the last destroyer Shigure.  At 0353 West Virginia opened fire and score hits on her first salvo. She was joined by California and Tennessee at 0355, the other battleships with their Mark 3 fire direction radars were slow to open up. Maryland got off six full salvoes by ranging in on the splashes of West Virginia, California and Tennessee.  Mississippi logged the final salvo of the battle and Pennsylvania got no shots off.  West Virginia fired 16 salvoes, 96 round of 16”armor piercing shells, Tennessee got off 69 rounds and California 63 of 14” armor piercing, Maryland added forty eight 16” rounds.

The Yamashiro and Mogami sailed into the maelstrom absorbing hit after hit and gamely fought back. Yamashiro hit the destroyer Albert W Grant which was also hit by friendly fire badly damaging her. Finally both ships ablaze they turned back down the strait with Yamashiro sinking with few survivors at 0420.  Shima’s force entered the fray and the Light Cruiser Abukuma was damaged by a torpedo fired by PT-137 and fell out of the formation. She was sunk on 26 October by Army Air Force B-24s. As Shima came up the strait his force entered the battered remnants of Nishimura’s force, the burning halves of Fuso and the retreating Mogami and Shigure. Assuming the halves of Fuso to be the wreckage of both battleships Shima beat a hasty retreat but in the process his flagship Nachi collided with Mogami flooding Mogami’s steering engine room and leaving her crippled.  She was attacked again by American cruisers and aircraft and as abandoned at 1047 and scuttled a torpedo from the destroyer Akebono sinking at 1307 on 25 October.

Nachi under air attack 5 November 1944

The battle was one of the most lopsided surface engagements of the war.  When it was over only one of Nishimura’s ships had survived the “lucky” Shigure.  Shima’s force survived the night but most of his ships were sunk in the following by war’s end. Nachi was sunk in Manila Bay on 5 November by aircraft from the USS Lexington with a loss of over 800 sailors while Shima was in a conference ashore.

With the exception of Albert W Grant and a PT Boat the American force was unscathed the old Battlewagons dredged from the mud of Peal Harbor had led the fleet to a decisive victory in the last duel between Dreadnaughts ever fought. The Japanese died as Samurai trying to complete a hopeless mission against a far superior force.

Next: Halsey’s fateful Decision….

Peace

Padre Steve+

2 Comments

Filed under Loose thoughts and musings

An Invincible Fleet and a Flawed Plan: The Japanese at Midway

Note: This is the first of a series of articles coming over the next few days about the Battle of Midway, a major turning point of the Second World War.

The Battleship Yamato, Flagship of the Combined Fleet and symbol of Japanese Naval Power

The Imperial Japanese Navy under the command of Admiral Isoruku Yamamoto had been humiliated. On April 18th 1942 16 B-25 bombers under the command of Colonel Jimmy Doolittle were launched from the deck of the USS Hornet and bombed Tokyo.  Though the physical damage was insignificant the psychological impact was massive on the Japanese military establishment. Yamamoto and his deputy Rear Admiral Matome Ugaki had explored the possibility of attacking Midway in the early months of 1942 as the Japanese armed forces competed with each other to determine an overall strategy for the war effort. The Army was insistent on a China strategy while the Navy preferred expansion in the Western, South and Central Pacific.  Yamamoto’s idea envisioned seizing Midway and using it as a forward base from which an invasion of Hawaii could be mounted as well as the bait to draw the carrier task forces of the U.S. Navy into battle and destroy them.

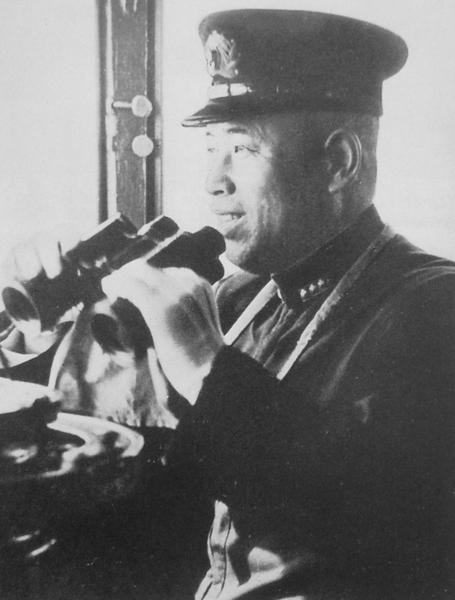
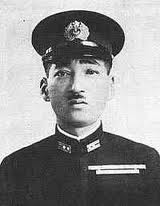
Admiral Isoruku Yamamoto, CinC Combined Fleet

The Japanese certainly had the forces to accomplish the mission outnumbering the U.S. Navy which had taken heavy losses at Pearl Harbor and in the Far East.  Following the Doolittle raid Yamamoto went ahead with the plan to invade Midway. The operation, named MI was coupled with an invasion of the islands of Attu and Kiska in the Aleutians which would form a picket line to prevent future attacks on the Japanese mainland. Fuchida

Yamamoto’s plan was not without its critics, the majority of the Staf of the First Air Fleet embarked on the First Carrier Striking Force was not in favor including the leader of the Pearl Harbor attack Commander Mitsuo Fuchida who considered it “grammar school strategy.”   Despite objections from them as well as his Fleet Operations Officer Yamamoto directed that the plan be implemented.  The plan was to have the First Carrier Striking Force attack Midway and reduce its defenses so that the Invasion Force could undertake the task of invading and occupying Midway.  Supporting these forces was the Main Body built around Battleship Division One included Yamamoto’s flagship the 72,000 ton behemoth Yamato.  Another strong force was assigned to the Aleutian operation. The task forces were spread out across the North Pacific and would not able to provide mutual support to each other in a timely manner.

Japanese Forces were organized in the following manner.

Main Body, Admiral Yamamoto

BatDiv 1, Admiral Yamamoto

BB Yamato (flagship, Yamato), Captain

BB Nagato (Nagato), Captain Hideo Yano

BB Mutsu (Nagato), Captain Teijiro Yamazumi

Carrier Group, Captain Kaoru Umetani

CVL Hosho (Hosho), Captain Umetani

Air Unit (8 bombers), Lieutenant Yoshiaki Irikiin

DD Yukaze (Minekaze), Lieutenant Commander Shizuka Kajimoto

Special Force, Captain Kaku Harada

Chiyoda (seaplane carrier, Chitose), Captain Harada

Nisshin (seaplane carrier, Nisshin), Captain Katsumi Komazawa

Screen (DesRon 3), RADM Shintaro Hashimoto

CL Sendai (flagship, Jintsu), Captain Nobue Morishita

DesDiv 11, Captain Kiichiro Shoji

DD Fubuki (Fubuki), Captain Shizuo Yamashita

DD Shirayuki (Fubuki), Captain Taro Sugahara

DD Hatsuyuki (Fubuki), Captain Lieutenant Commander Junnari Kamiura

DD Murakumo (Fubuki), Captain Commander Hideo Higashi

DesDiv 19, Captain Ranji Oe

DD Isonami (Fubuki), Commander Ryokichi Sugama

DD Uranami (Fubuki), Commander Tsutomu Hagio

DD Shikinami (Fubuki), Commander Akifumi Kawahashi

DD Ayanami (Fubuki), Commander Eiji Sakuma

1st Supply Unit, Captain Shigeyasu Nishioka

Naruto (Oiler), Captain Nishioka

Toei Maru (Oiler)

It was Yamamoto’s plan to use this force to polish off U.S. Forces that would only enter the fight after he had taken Midway. Despite the success of his carrier task forces at his heart Yamamoto was still a Battleship Sailor and believed that his battleships would be the deciding factor in the final destruction of the U.S. Navy forces in the Pacific.  This force could be augmented by the Aleutian Guard Force, detached from the Main Body under the command of Vice Admiral Shiru Takasu and was composed of the following fleet units:

GUARD (Aleutians Screening) FORCE, VADM Shiro Takasu in Hyuga

Chief of Staff, Rear Admiral Kengo Kobayashi

BatDiv 2

BB Hyuga (flagship, Hyuga), Captain Chiaki Matsuda

BB Ise (Hyuga), Captain Isamu Takeda

BB Fuso (Fuso), Captain Mitsuo Kinoshita

BB Yamashiro (Fuso), Captain Gunji Kogure

Screen, RADM Fukuji Kishi

CruDiv 9, Rear Admiral Kishi

CL Kitakami ( flagship, Kuma), Captain Saiji Norimitsu

CL Oi (Kuma), Captain Shigeru Narita

DesDiv 20, Captain Yuji Yamada

DD Asagiri (Fubuki), Commander Nisaburo Maekawa

DD Yugiri (Fubuki), Captain Masayoshi Motokura

DD Shirakumo (Fubuki), Commander Toyoji Hitomi

DD Amagiri (Fubuki), Captain Buichi Ashida

DesDiv 24, Captain Yasuji Hirai

DD Umikaze (Shiratsuyu), Commander Nagahide Sugitani

DD Yamakaze (Shiratsuyu), Commander Shuichi Hamanaka

DD Kawakaze (Shiratsuyu), Commander Kazuo Wakabayashi

DD Suzukaze (Shiratsuyu), Commander Kazuo Shibayama

DesDiv 27, Captain Matake Yoshimura

DD Ariake (Hatsuharu), Commander Shoichi Yoshida

DD Yugure (Hatsuharu), Commander Kiyoshi Kamo

DD Shigure (Shiratsuyu), Commander Noboru Seo

DD Shiratsuyu (Shiratsuyu), Lieutenant Commander Kimmatsu Hashimoto

2nd Supply Unit, Captain Matsuo Eguchi

San Clemente Maru (oiler), Captain Eguchi

Toa Maru (oiler)

The force that was the true heart of the Japanese Navy in early 1942 was the First Carrier Striking Force which at Pearl Harbor and in the months following had run roughshod over all Allied opposition.  Initially composed of 6 flattops the force was reduced to four when the Shokaku was heavily damaged and Zuikaku’s air group decimated at the Battle of the Coral Sea on 8 May 1942.  Nevertheless it was still a formidable and experienced force in its own right.  Commanded by Vice Admiral Chuichi Nagumo it was composed of the following units:

FIRST CARRIER STRIKING FORCE (1st Air Fleet), VADM Chuichi Nagumo

Carrier Group, VADM Nagumo

CarDiv 1

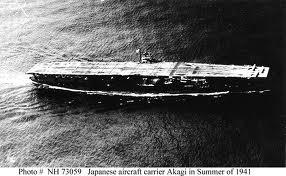
CV Akagi  (flagship, Akagi) 21 Zero fighters, 21 dive bombers, 21 torpedo bombers

CV Kaga (Kaga) 21 Zero fighters, 21 dive bombers, 30 torpedo bombers

CarDiv 2 — RADM Tamon Yamaguchi

CV Hiryu (flagship, Hiryu) 21 Zero fighters, 21 dive bombers, 21 torpedo bombers

CV Soryu (Hiryu) 21 Zero fighters, 21 dive bombers, 21 torpedo bombers

Support Group — RADM Hiroaki Abe CruDiv 8

CA Tone (flagship, Tone)

CA Chikuma (Tone)

2nd Section, BatDiv 3 —

BB Haruna (Kongo)

BB Kirishima (Kongo)

Screen (DesRon 10) — RADM Susumu Kimura

CL Nagara (flagship, Nagara)

DesDiv 4 — 4 DDs

DesDiv 10 — 3 DDs

DesDiv 17 — 4 DDs

Supply Group — 5 oilers, 1 DD

The Invasion Force under the command of Vice Admiral Nobutake Kondo was a formidable surface strike group in its own right and was built around 2 Fast Battleships, 9 Heavy Cruisers and a light carrier.

MIDWAY INVASION FORCE, (2nd Fleet), VADM Nobutake Kondo

Invasion Force Main Body

CruDiv 4 (less 2nd section)

CA Atago (flagship, Takao),

CA Chokai (Takao)

CruDiv 5 (less 2nd section)

CA Myoko (Myoko)

CA Haguro (Myoko)

BatDiv 3 (less 2nd section) —

BB Kongo (Kongo)

BB Hiei (Kongo)

Screen (DesRon 4) — RADM Shoji Nishimura

CL Yura (flagship, Nagara)

DesDiv 2 — 4 DDs

DesDiv 9 — 3 DDs

Carrier Group Zuiho (CVL) — 12 Zero fighters, 12 torpedo bombers; 1 DD

Supply Group — 4 oilers, 1 repair ship

Close Support Group — VADM Takeo Kurita

CruDiv 7

CA Kumano (flagship, Mogami)

CA Suzuya (Mogami)

CA Mikuma (Mogami)

CA Mogami (Mogami)

DesDiv 8 — 2 DDs 1 oiler

Transport Group — RADM Raizo Tanaka

12 transports carrying troops

3 patrol boats carrying troops

1 oiler

Escort (DesRon 2) — RADM Tanaka

CL Jintsu (flagship, Jintsu)

DesDiv 15 — 2 DDs

DesDiv 16 — 4 DDs

DesDiv 18 — 4 DDs

Seaplane Tender Group — RADM Riutaro Fujita

Seaplane Tender Div 11

Chitose (CVS) — 16 fighter seaplanes, 4 scout planes

Kamikawa Maru (AV) — 8 fighter seaplanes, 4 scout planes

1 DD;

1 patrol boat carrying troops

Minesweeper Group

4 minesweepers

3 submarine chasers

1 supply ship

2 cargo ships

The Northern Force which was assigned to the invasion and occupation of Attu and Kiska was commanded by Vice Admiral Moshiru Hosogaya included the carriers Ryujo and Junyo which had they accompanied the First Carrier Striking Force might have given the Japanese the edge that they would have needed to recover when that force was destroyed on June 4th.  This force was composed of the following units:

NORTHERN (Aleutians) FORCE (5th Fleet) — VADM Moshiro Hosogaya

Northern Force Main Body

CA Nachi (flagship, Myoko)

Screen —

2 DDs

Supply Group —

2 oilers, 3 cargo ships

Second Carrier Striking Force — RADM Kakuji Kakuta

Carrier Group (CarDiv 4)

CVL Ryujo (flagship, Ryujo) — 16 Zero fighters, 21 torpedo bombers

CV Junyo (Junyo) — 24 Zero fighters, 21 torpedo bombers

Support Group (2nd section, CruDiv 4) —

CA Maya (Takao)

CA Takao (Takao)

Screen (DesDiv 7) —

3 DDs

1 oiler

Attu Invasion Force — RADM Sentaro Omori

CL Abukuma (flagship, Nagara)

DesDiv 21 —

4 DDs

1 minelayer

1 transport carrying troops

Kiska Invasion Force — Capt. Takeji Ono

CruDiv 21 —

CL Kiso

CL Tama 

AMC Asaka Maru (auxiliary cruiser)

Screen (DesDiv 6) —

3 DDs

2 transports carrying troops

Minesweeper Div. 13 —

3 minesweepers

Submarine Detachment — RADM Shigeaki Yamazaki

SubRon 1 — I-9 (flagship)

SubDiv 2 — 3 submarines

SubDiv 4 — 2 submarines

Note all Japanese Fleet information obtained online at http://www.microworks.net/pacific/orders_of_battle/midway_japan.htm

These forces were augmented by a submarine screening force and land based naval air forces stationed at Wake and Kwajalein.

The plan was complicated and depended on the Americans reacting exactly as the plan anticipated them doing.  Yamamoto never expected that the Americans would be waiting for his forces and had knowledge of his plans due to the efforts of U.S. Navy code breakers under the direction of Commander Joseph Rochefort and the Fleet Intelligence Officer Captain Edwin Layton had broken the top secret Japanese Navy JN-25 Code.  Thus despite the massive amount of forces involved the plan was seriously flawed and left the advanced forces vulnerable to unexpected American moves.

Next: Calculated Risk: The American Forces and Strategy at Midway

6 Comments

Filed under History, Navy Ships, US Navy, world war two in the pacific