Tag Archives: ijn haruna

The Battle of Cape Esperance: October 11-12 1942

Naval battles between U.S. Navy and Imperial Japanese Navy surface forces around Guadalcanal in 1942 were almost always brief and bloody. The number of ships sunk in the area around Guadalcanal, Tulagi and Savo Island led to the area being nicknamed “Iron Bottom Sound.”

The battles around Guadalcanal occurred in a time of technical transition as radar became better at detecting ships and fire direction systems advanced. By October 1942 the U.S. Marines battling on Guadalcanal were fighting an enemy growing in numbers and felt the effects of the the predatory Japanese surface raiders that routinely bombarded their positions and endangered U.S. resupply efforts.

USS Helena

Since the Marine, Navy and Army Air Force Squadrons based on Guadalcanal maintained air superiority in the nearby waters during the day the Japanese were limited to night surface operations against the island, operations involving the reinforcement and resupply of Japanese Forces on the island as well as offensive operations to aid the land forces by attempting to make the U.S. airstrip, Henderson Field inoperable.

Henderson Field

The first of their major operations was in early August when a Japanese cruiser destroyer force ravaged the U.S. cruiser forces off Savo Island sinking 3 American and one Australian Heavy cruiser while damaging another. The Battle was a disaster for the U.S. forces and led to the early withdraw of ships of the invasion force before many could finish unloading the equipment and supplies that were critical to the operation.

The Tokyo Express Route along the Slot

Japanese resupply and reinforcement operations were so frequent that the Japanese forces were nicknamed the Tokyo Express by the Americans. Knowing that the Marines who had been in bitter combat with the Japanese needed reinforcements the U.S. sent a convoy to land the 164th Infantry Regiment of the Americal Division on October 13th and sent a surface task force TF-64 composed of the Cruisers USS San Francisco, USS Boise, USS Salt Lake City and USS Helena and 5 destroyers under the command of Rear Admiral Norman Scott to protect it from any Japanese surface threats.

IJN Heavy Cruiser Aoba after the battle

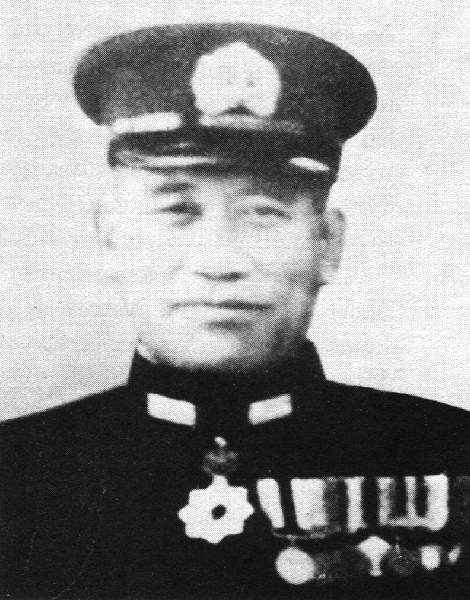
The U.S. moves coincided with a Japanese reinforcement effort which was covered by a force of three heavy cruisers, the Aoba, Furutuka and Kinugasa and two destroyers under the command of Rear Admiral Arimoto Goto. The Japanese cruisers were to bombard Henderson Field as the Japanese were not expecting any American surface forces to oppose their effort.

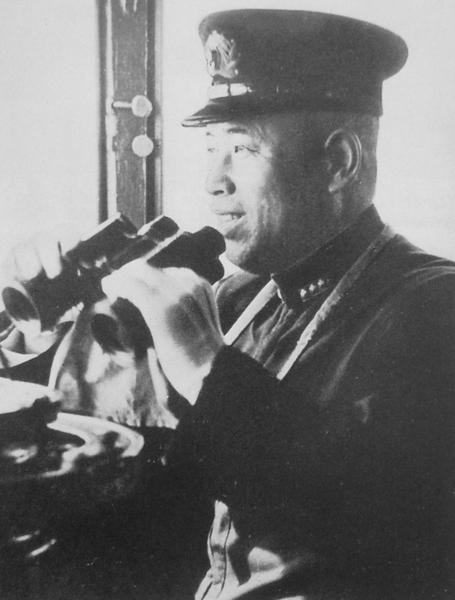
Rear Admiral Arimoto Goto

The Japanese were detected by aerial reconnaissance on the afternoon of the 10th when they were about 200 miles from Guadalcanal. Scott, whose forces lacked experience in night surface combat made a simple plan to “cross the T” of the enemy force in a single line formation with three destroyers in the van, the cruisers in the center and two destroyers in the rear.

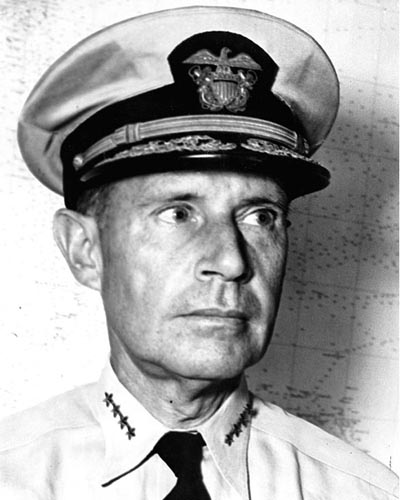
Rear Admiral Norman Scott

U.S. floatplanes from the cruisers detected the Japanese at 2300 hours and at 2322 the radar of the USS Helena picked up the Japanese force at a range of about 27,000 yards. However misunderstandings of Scott’s orders broke his formation and put the van destroyers out of position in the poor visibility of the moonless night caused Scott to believe that the radar contacts were his own destroyers.

The Japanese still did not realize that an American force was near them and continued on. At 2345 the ships were only about 5,000 yards apart when Helena radioed asking permission to fire. The message was received by Scott who did not grant permission but acknowledged receipt of the message. Mistaking this as permission Helena, followed by the other cruisers opened a devastating fire on the Japanese force. Goto’s lookouts had sight the Americans at 2343 but assumed that they were friendly. The result was heavy damage to the Japanese flagship Aoba and left Goto mortally wounded.

IJN Heavy Cruiser Furutaka

Scott. taken by surprise ordered ceasefire at 2347 thinking that he was shooting at his own destroyers, but resumed fire at 2351. At 2349 Furutaka was heavily damaged by American fire and at 2358 was hit by a torpedo fired by the destroyer Buchanan. The Japanese destroyer Fubuki was mortally wounded about the same time and began to sink. The U.S. destroyers Duncan and Farenholt were both damaged in the crossfire with Duncan so badly damaged that she would be abandoned and sunk.

USS Duncan

The American cruisers turned on their searchlights which provided the last Japanese cruiser, Kinugasa the opportunity to hit them hard. Kinugasa heavily damaged Boise forcing her out of the battle. As Boise sheared away from the action Kinugasa and Salt Lake City exchanged fire hitting each other before the Japanese cruiser broke off the action.

The commander of the Japanese reinforcement group, his mission completed dispatched destroyers to assist Goto’s force at it withdrew and rescue survivors. However these ships were caught by U.S. aircraft from Henderson Field as the light of the dawn lit the sky. The destroyers Murakumo and Natsugumo were heavily damaged and scuttled.

On the 13th the American reinforcements arrived, as did Japanese reinforcements that night. On the night the 13th Japanese battleships Kongo and Haruna almost destroyed Henderson Field. However the resilient Marines kept the airfield operational and the Marines of the 1st Marine Division and the nearly arrived soldiers of the 164th Regiment held off a major Japanese assault from 23-26 October, known as the Battle of Henderson Field or Bloody Ridge.

Task Force 64 lost one destroyer sunk and two cruisers damaged while the Japanese lost one cruiser and three destroyers sunk and two cruisers damaged, with Aoba taking severe damage from nearly 40 6” and 8” shells that knocked her out of the war for four months. The battle had lasted less than 50 minutes from the time Helena picked up the Japanese force on her radar.

The battle was a tactical victory for the U.S. Navy but the lessons of the battle about the power of Japanese torpedoes and effectiveness in night combat were not learned causing other U.S. task forces to have to learn the hard way in subsequent engagements. Rear Admiral Scott would not long survive his victory being killed in action aboard the USS Atlanta during the Naval Battle of Guadalcanal just a month later.

Peace

Padre Steve+

6 Comments

Filed under History, Military, Navy Ships, US Navy, world war two in the pacific

The Battle of Leyte Gulf: Introduction and the Battle of Palawan Passage

This is the first of a four article series on the Battle of Letye Gulf. The battle was the largest in history both in terms of the number of ships involved and the amount of area covered. The action was triggered by the American invasion of the Philippines causing the Japanese to initiate their Shō-Gō 1 (Victory Plan 1) to attempt to defeat the Americans.  The plan relied heavily on land based air power which most of unfortunately for the Japanese was destroyed during the American carrier air strikes on Formosa earlier in the month. 

The battle was necessitated by the absolute need for the Japanese to hold the Philippines and defeat the Americans at all costs. As Admiral Soemu Toyoda the Chief of the Combined Fleet explained under interrogation after the war

Should we lose in the Philippines operations, even though the fleet should be left, the shipping lane to the south would be completely cut off so that the fleet, if it should come back to Japanese waters, could not obtain its fuel supply. If it should remain in southern waters, it could not receive supplies of ammunition and arms. There would be no sense in saving the fleet at the expense of the loss of the Philippines.

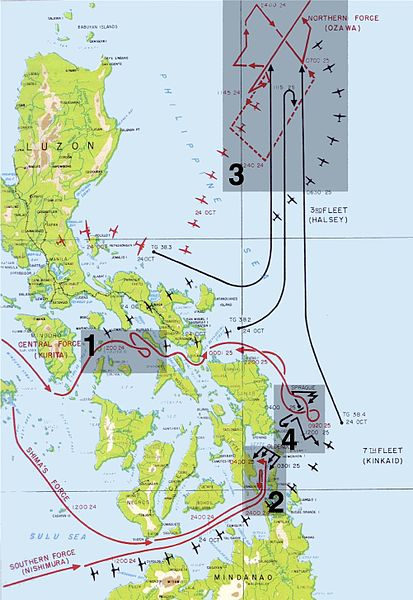
The battle was comprised of 5 battles, the Battle of Palawan Passage, the Battle of the Sibuyan Sea, the Battle of Surigao Strait, the Battle of Cape Engaño and the Battle off Samar. All told about 70 Japanese warships and 210 American and Australian ships were engaged.  A further 300 Japanese aircraft, mostly land based and 1500 American carrier aircraft took part in the battle.  The Japanese order of battle included 1 Fleet and 3 Light Fleet Carriers with a minimal air group, 9 Battleships including the two largest ever built the Yamato and Musashi, 14 Heavy and 6 Light Cruisers and about 3 destroyers.  They were divided into four task forces, the Northern Force under the command of Vice-Admiral Jisaburō Ozawa which had all of the Carriers including the last surviving carrier of the Pearl Harbor attack the Fleet Carrier Zuikaku plus the converted hybrid Battleships Ise and Hyuga; the Southern Force which was two distinct and independent task forces under the command of Vice Admirals Shoji Nishimura and Kiyohide Shima and was built around the ancient battleships Fuso and Yamashiro and 3 Heavy Cruisers; and the Center Force under the command of Vice Admiral Takeo Kurita which had the Battleships Yamato, Musashi, Nagato, Kongo and Haruna, 10 Heavy and 2 Light Cruisers and 1 destroyers.  The Center force was to pass through the San Bernardino Strait and converge on the American landing forces off Samar with the Southern Force which as to come through the Surigo Strait.  The Japanese also planned for the first use of Kamikazes as part of the action. 

Takao Class Cruiser 1943

Atago

The American fleet was comprised of the 3rd Fleet under Admiral William Halsey which was built around the Fast Carrier Task Forces and Fast Battleships of Task Force 38 under the Command of Vice Admiral Marc Mitscher and the Battle Line Task Force 34 under the Command of Vice Admiral Willis Lee; and the 7th Fleet under Vice Admiral William Kinkaid which was the naval support for the landings.  It had under its control the old Battleships West Virginia, California, Tennessee, Maryland, Colorado and Pennsylvania and 18 Escort Carriers which provided the close air support for the Invasion.  All told the Americans had 8 Fleet and 8 Light Fleet Carriers, 18 Escort Carriers, 12 Battleships, 24 Cruisers and 141 Destroyers as well as submarines, PT Boats, Transports, Landing Ships and Auxiliaries.

Takao

This series will focus on a number of individual battles and decisions in the battle. Part one will focus on the action of the Submarines Darter and Dace against the Center force in the Palawan Passage. The next will be the sinking of the Musashi during the Battle of the Sibuyan Sea, it will be followed by the revenge of the Old Battleships at Surigo Strait. The next will be the great decision of Admiral Halsey to pursue the Northern Force and leave the San Bernardino Strait unguarded, followed by the Battle off Samar and last the death of the Japanese Naval Aviation at Cape Engaño.

Maya

The Battle of Palawan Passage

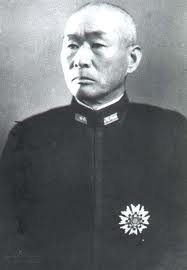
Admiral Takeo Kurita and the powerful Center Force departed their anchorage at Bruneion 20 October 1944.  The task force entered the Palawan Passage on the night of 22-23 October where they were sighted by the American Submarines Darter and Dace which had been posted at the strait for such a possibility.  Darter made radar contact at 30,000 yards at 0018 hours on the 23rd and sent out contact reports.   The two submarines shadowed the Center Force on the surface to gain an intercept position and submerged just before dawn.

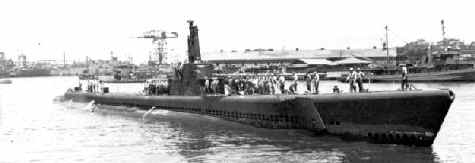
USS Darter

Darter struck first at 0524 firing a spread of 6 torpedoes scoring 4 hits on Admiral Kurita’s flagship the Heavy Cruiser Atago. She reloaded and stuck the Heavy Cruiser Takao with 2 torpedoes at 0634.  At 0554 Dace hit the Heavy Cruiser Maya with 4 torpedoes.

Vice Admiral Takeo Kurita

The blow was severe.  Atago was mortally wounded she capsized and sank at 0553 with the loss of 360 crew members. She sank so rapidly that Kurita had to swim and was rescued with his Chief of Staff by a destroyer, but many of his staff members were lost with the ship.  Though Kurita transferred his flag to Yamato he was now without the advice and counsel of officers that might have prevented later mistakes during the Battle off Samar.  Takao suffered heavy damage and though she did not sink she had to proceed crippled to Singapore under the guard of two destroyers. Though she survived the war she never saw action again.   Maya, struck at 0554 by 4 torpedoes suffered much damage and was wracked by powerful secondary explosions.  By 0600 she was dead in the water and sank five minutes later with the loss of 337 crew members.

USS Dace

The attack of the two submarines was significant; the Japanese lost 3 powerful Heavy Cruisers and had to send two of their destroyers away to guard Takao. Likewise the loss of Kurita’s experienced staff hindered his conduct of the battle on the 24th.  The cruisers were a big loss, at 13,000 tons and armed with ten 8”guns they could steam at 35 knots.

Darter and Dace conducted a pursuit of the crippled Takao which had to be broken off when Darter ran aground on Bombay Shoal. Despite the best efforts of her crew and that of the Dace to free her she was hopelessly stuck.  Her crew was unable to scuttle her and the Japanese were able to board her after she was abandoned and for the first time get a look at the details of a Gato class submarine.

Kurita’s force would continue on into theSibuyan Seawhere they would be attacked again.  But that is the subject of the next article.

5 Comments

Filed under Navy Ships, US Navy, world war two in the pacific

The Great Marianas Turkey Shoot

U.S. Navy personnel observe the Air Battle from a Carrier

The Battle of the Philippine Sea of 19-20 June 1944 was the largest carrier battle in history.  Twenty four aircraft carriers, 15 American and 9 Japanese embarking over 1400 aircraft dueled in the Central Pacific in a battle that so decimated Japanese Naval Aviation that it never recovered. The battle and the subsequent fall of Saipan brought down the government of General Tojo and was the beginning of the collapse of the Japanese Empire and the “Greater Asia Co-Prosperity Sphere.”  

http://dsc.discovery.com/videos/destroyed-in-seconds-marianas-turkey-shoot.html

In late 1943 the Japanese realized that they needed to recover the initiative in the Pacific.  Between the Battle of the Coral Sea and the Battle of Santa Cruz Japanese Naval aviation suffered crippling losses especially among the elite pilots and aircrews with who they had begun the war.  These losses were compounded when the Navy attempted to support the operations of the Army to defend the Solomons and New Guinea.  Squadrons sent to battle the United States Navy, Marine Corps and Army Air Corps suffered at the hands of the every more skilled and well equipped American fighter squadrons the victims of which included Admiral Isoruku Yamamoto the Commander of the Combined Fleet when the Betty bomber that he was traveling on was ambushed by U.S. Army Air Corps P-38 Lightening fighters.

Vice Admiral Jisaburō Ozawa

By late 1943 the Japanese were attempting to train new pilots and aircrews to man the carriers of the Combined Fleet’s Carrier Striking Forces.  Admiral Soemu Toyoda, the new commander of the Combined Fleet and its third commander in less than a year developed “Plan A-Go” as a means to mass carrier and land based aviation assets to defeat the Fast Carrier Task Forces of the United States Navy.  The rebuilt Carrier Striking Groups built around 9 carriers embarking 473 aircraft was commanded by Vice Admiral Jisaburō Ozawa who had taken over from Vice Admiral Chuichi Nagumo.

D4Y3 “Judy” Dive Bomber

The Japanese discerned the intentions of the Americans when American Carrier aircraft struck Saipan and Guam. The Japanese had expected the Americans to strike further south and the Marianas had few land-based aircraft in the area. Toyoda made the decision to engage the Americans and ordered the fleet to attack. American submarines discovered the gathering Japanese forces. The Japanese forces were assembled by the 17th and by the 18th the 5th Fleet under the command of Admiral Raymond Spruance spearheaded by Task Force 58 Commanded by Vice Admiral Marc Mitscher had assembled west of Saipan to meet the Japanese.  The Americans fielded 15 carriers including 9 Fleet Carriers of which 6 were the new Essex Class Fleet Carriers which embarked 956 aircraft.

The F6F Hellcat cemented its place as the premier fighter plane of the Pacific war during the “Turkey Shoot”

The Americans held both a quantitative and qualitative advantage against the Japanese. The American fighter squadrons were equipped with the F6F Hellcat which was far superior to the now obsolescent Japanese Zero fighters and their pilots and aircrews were now more experienced and proficient than the newly minted Japanese aviators who by and large had little combat experience and were flying inferior aircraft.  The Japanese had not planned for a long war and had done little to systemically address the heavy losses that their force experienced during 1942 and 1943 at Coral Sea, Midway, Eastern Solomons, Santa Cruz and in the Solomons campaign.

Vice Admiral Marc Mitscher aboard the USS Lexington

Mitscher desired to move aggressively against the Japanese. However he was overruled by Spruance who acting on the advice of his Battle Line Commander Vice Admiral Willis Lee decided that a possible night surface action with the Japanese was not desirable. Spruance instead directed Mitscher to be ready to defend against Japanese air strikes knowing that his carriers and carrier based air groups was more than a match for the Japanese air groups.   Spruance has been criticized for his decision but the words of Willis Lee, a veteran of the Naval Battle of Guadalcanal where he defeated a Japanese force sinking the Battleship Kirishima.  He prevailed in his flagship the USS Washington but losing three of four escorting destroyers and seeing his second battle wagon the USS South Dakota heavily damaged. A night surface engagement was not worth the risk as in Lee’s eyes it evened the playing field for the Japanese and took away the American air power advantages.

A Japanese aircraft goes down in flames

The Japanese began the action on the 19th sending successive attack waves against Task Force 58. They were met by massed formations of Hellcats vectored in by air controllers in the Combat Information Centers of the American carriers using their superior air search radar systems.  In less than two hours well over 200 Japanese aircraft were downed by the Hellcats.  Lieutenant Alexander Vraicu shot down 6 “Judy” dive bombers in minutes before low on fuel he returned to the USS Lexington.

Lieutenant Alexander Vraicu holds up six fingers on board the USS Lexington

While the Hellcats were chewing up the Japanese squadrons the American submarines USS Albacore and USS Cavalla each sank a Japanese Fleet Aircraft Carrier.  The Albacore hit the Ozawa’s flagship, the new Tiaho with a torpedo which caused minimal damage, but ruptured fuel lines. The Japanese damage control officer opened vents in the ship which allowed the fumes to spread throughout the carrier. They were ignited by a generator causing massive explosions and forcing Ozawa to abandon his flagship. Tiaho would sink by late afternoon after being ripped apart by a series of massive explosions taking with her 1650 of 1750 officers and crew. Cavalla hit the Pearl Harbor veteran Shokaku with a spread of three torpedoes causing that ship to burst into flames with aircraft and ordnance adding to the conflagration. A massive explosion ripped through the ship causing her to sink with a loss of over 1200 officers and crew.

The Japanese flagship Tiaho and her killer the USS Albacore

Toyoda desired that Ozawa retire from the battle before he suffered more losses but Ozawa wanted to stay around and hit the Americans with everything that he had left. The Americans sailed west during the night to seek out the Japanese Fleet. It took the majority of the day to find the Japanese. With only 75 minutes of daylight remaining Mitscher launched a strike despite the risk to his aircrew the majority whom were not trained in night landings.  The American strike sank the carrier Hiyo and two tankers and damaged the carriers Zuikaku, Chitoyda and Junyo as well as the battleship Haruna.  By the end of the day Ozawa had 35 aircraft in flyable condition.

The Japanese Fleet under attack, carrier Zuikaku and two destroyers on June 20th

The final part of the drama was the return of the American strike group to the carriers. Knowing that if he maintained darken ship he would lose many aircraft and the men that flew them Mitscher ordered that the fleet turn on its lights. This act though incredibly risky helped bring the majority of the aircraft to land or ditch near the task force.  The Americans lost less than 100 aircraft many due to the night landings and many of the aircrew were rescued. The Japanese also lost nearly 200 land based aircraft.

Admiral Raymond Spruance

The battle was the death-kneel of Japanese Naval Aviation. Later in the year the carriers again under Ozawa sailed against the Americans only this time they were a decoy force at the Battle of Leyte Gulf, a role that they succeeded in admirably. The American carriers now had free run of the Pacific only opposed by land based aircraft many used in a Kamikaze role until the end of the war. These would cause fearful losses among the American ships heavily damaging a number of carriers.

The battle is often forgotten by due to its proximity to the Normandy landings but was a significant step in the fight against Japan. The islands captured by the Americans, Saipan, Tinian and Guam would provide major sea and air staging areas for the final assault against Japan. Tinian would become the base of many Army Air Corps B-29 “Superfortress” bombers including those that dropped the Atomic bombs less than 14 months later. It was a turning point both militarily and politically. With the fall of the Tojo government the Japanese leaders began to slowly tell the truth about wartime setbacks and losses to a people that it had lied to since their invasion of China and occupation of Mongolia.  It was a setback that even Tojo and the highest leadership of Japan knew that they could not recover.

5 Comments

Filed under History, Military, US Navy, world war two in the pacific

An Invincible Fleet and a Flawed Plan: The Japanese at Midway

Note: This is the first of a series of articles coming over the next few days about the Battle of Midway, a major turning point of the Second World War.

The Battleship Yamato, Flagship of the Combined Fleet and symbol of Japanese Naval Power

The Imperial Japanese Navy under the command of Admiral Isoruku Yamamoto had been humiliated. On April 18th 1942 16 B-25 bombers under the command of Colonel Jimmy Doolittle were launched from the deck of the USS Hornet and bombed Tokyo.  Though the physical damage was insignificant the psychological impact was massive on the Japanese military establishment. Yamamoto and his deputy Rear Admiral Matome Ugaki had explored the possibility of attacking Midway in the early months of 1942 as the Japanese armed forces competed with each other to determine an overall strategy for the war effort. The Army was insistent on a China strategy while the Navy preferred expansion in the Western, South and Central Pacific.  Yamamoto’s idea envisioned seizing Midway and using it as a forward base from which an invasion of Hawaii could be mounted as well as the bait to draw the carrier task forces of the U.S. Navy into battle and destroy them.

Admiral Isoruku Yamamoto, CinC Combined Fleet

The Japanese certainly had the forces to accomplish the mission outnumbering the U.S. Navy which had taken heavy losses at Pearl Harbor and in the Far East.  Following the Doolittle raid Yamamoto went ahead with the plan to invade Midway. The operation, named MI was coupled with an invasion of the islands of Attu and Kiska in the Aleutians which would form a picket line to prevent future attacks on the Japanese mainland. Fuchida

Yamamoto’s plan was not without its critics, the majority of the Staf of the First Air Fleet embarked on the First Carrier Striking Force was not in favor including the leader of the Pearl Harbor attack Commander Mitsuo Fuchida who considered it “grammar school strategy.”   Despite objections from them as well as his Fleet Operations Officer Yamamoto directed that the plan be implemented.  The plan was to have the First Carrier Striking Force attack Midway and reduce its defenses so that the Invasion Force could undertake the task of invading and occupying Midway.  Supporting these forces was the Main Body built around Battleship Division One included Yamamoto’s flagship the 72,000 ton behemoth Yamato.  Another strong force was assigned to the Aleutian operation. The task forces were spread out across the North Pacific and would not able to provide mutual support to each other in a timely manner.

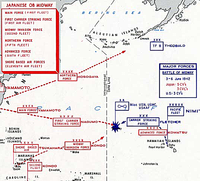
Japanese Forces were organized in the following manner.

Main Body, Admiral Yamamoto

BatDiv 1, Admiral Yamamoto

BB Yamato (flagship, Yamato), Captain

BB Nagato (Nagato), Captain Hideo Yano

BB Mutsu (Nagato), Captain Teijiro Yamazumi

Carrier Group, Captain Kaoru Umetani

CVL Hosho (Hosho), Captain Umetani

Air Unit (8 bombers), Lieutenant Yoshiaki Irikiin

DD Yukaze (Minekaze), Lieutenant Commander Shizuka Kajimoto

Special Force, Captain Kaku Harada

Chiyoda (seaplane carrier, Chitose), Captain Harada

Nisshin (seaplane carrier, Nisshin), Captain Katsumi Komazawa

Screen (DesRon 3), RADM Shintaro Hashimoto

CL Sendai (flagship, Jintsu), Captain Nobue Morishita

DesDiv 11, Captain Kiichiro Shoji

DD Fubuki (Fubuki), Captain Shizuo Yamashita

DD Shirayuki (Fubuki), Captain Taro Sugahara

DD Hatsuyuki (Fubuki), Captain Lieutenant Commander Junnari Kamiura

DD Murakumo (Fubuki), Captain Commander Hideo Higashi

DesDiv 19, Captain Ranji Oe

DD Isonami (Fubuki), Commander Ryokichi Sugama

DD Uranami (Fubuki), Commander Tsutomu Hagio

DD Shikinami (Fubuki), Commander Akifumi Kawahashi

DD Ayanami (Fubuki), Commander Eiji Sakuma

1st Supply Unit, Captain Shigeyasu Nishioka

Naruto (Oiler), Captain Nishioka

Toei Maru (Oiler)

It was Yamamoto’s plan to use this force to polish off U.S. Forces that would only enter the fight after he had taken Midway. Despite the success of his carrier task forces at his heart Yamamoto was still a Battleship Sailor and believed that his battleships would be the deciding factor in the final destruction of the U.S. Navy forces in the Pacific.  This force could be augmented by the Aleutian Guard Force, detached from the Main Body under the command of Vice Admiral Shiru Takasu and was composed of the following fleet units:

GUARD (Aleutians Screening) FORCE, VADM Shiro Takasu in Hyuga

Chief of Staff, Rear Admiral Kengo Kobayashi

BatDiv 2

BB Hyuga (flagship, Hyuga), Captain Chiaki Matsuda

BB Ise (Hyuga), Captain Isamu Takeda

BB Fuso (Fuso), Captain Mitsuo Kinoshita

BB Yamashiro (Fuso), Captain Gunji Kogure

Screen, RADM Fukuji Kishi

CruDiv 9, Rear Admiral Kishi

CL Kitakami ( flagship, Kuma), Captain Saiji Norimitsu

CL Oi (Kuma), Captain Shigeru Narita

DesDiv 20, Captain Yuji Yamada

DD Asagiri (Fubuki), Commander Nisaburo Maekawa

DD Yugiri (Fubuki), Captain Masayoshi Motokura

DD Shirakumo (Fubuki), Commander Toyoji Hitomi

DD Amagiri (Fubuki), Captain Buichi Ashida

DesDiv 24, Captain Yasuji Hirai

DD Umikaze (Shiratsuyu), Commander Nagahide Sugitani

DD Yamakaze (Shiratsuyu), Commander Shuichi Hamanaka

DD Kawakaze (Shiratsuyu), Commander Kazuo Wakabayashi

DD Suzukaze (Shiratsuyu), Commander Kazuo Shibayama

DesDiv 27, Captain Matake Yoshimura

DD Ariake (Hatsuharu), Commander Shoichi Yoshida

DD Yugure (Hatsuharu), Commander Kiyoshi Kamo

DD Shigure (Shiratsuyu), Commander Noboru Seo

DD Shiratsuyu (Shiratsuyu), Lieutenant Commander Kimmatsu Hashimoto

2nd Supply Unit, Captain Matsuo Eguchi

San Clemente Maru (oiler), Captain Eguchi

Toa Maru (oiler)

The force that was the true heart of the Japanese Navy in early 1942 was the First Carrier Striking Force which at Pearl Harbor and in the months following had run roughshod over all Allied opposition.  Initially composed of 6 flattops the force was reduced to four when the Shokaku was heavily damaged and Zuikaku’s air group decimated at the Battle of the Coral Sea on 8 May 1942.  Nevertheless it was still a formidable and experienced force in its own right.  Commanded by Vice Admiral Chuichi Nagumo it was composed of the following units:

FIRST CARRIER STRIKING FORCE (1st Air Fleet), VADM Chuichi Nagumo

Carrier Group, VADM Nagumo

CarDiv 1

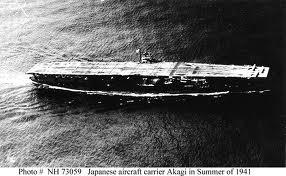
CV Akagi  (flagship, Akagi) 21 Zero fighters, 21 dive bombers, 21 torpedo bombers

CV Kaga (Kaga) 21 Zero fighters, 21 dive bombers, 30 torpedo bombers

CarDiv 2 — RADM Tamon Yamaguchi

CV Hiryu (flagship, Hiryu) 21 Zero fighters, 21 dive bombers, 21 torpedo bombers

CV Soryu (Hiryu) 21 Zero fighters, 21 dive bombers, 21 torpedo bombers

Support Group — RADM Hiroaki Abe CruDiv 8

CA Tone (flagship, Tone)

CA Chikuma (Tone)

2nd Section, BatDiv 3 —

BB Haruna (Kongo)

BB Kirishima (Kongo)

Screen (DesRon 10) — RADM Susumu Kimura

CL Nagara (flagship, Nagara)

DesDiv 4 — 4 DDs

DesDiv 10 — 3 DDs

DesDiv 17 — 4 DDs

Supply Group — 5 oilers, 1 DD

The Invasion Force under the command of Vice Admiral Nobutake Kondo was a formidable surface strike group in its own right and was built around 2 Fast Battleships, 9 Heavy Cruisers and a light carrier.

MIDWAY INVASION FORCE, (2nd Fleet), VADM Nobutake Kondo

Invasion Force Main Body

CruDiv 4 (less 2nd section)

CA Atago (flagship, Takao),

CA Chokai (Takao)

CruDiv 5 (less 2nd section)

CA Myoko (Myoko)

CA Haguro (Myoko)

BatDiv 3 (less 2nd section) —

BB Kongo (Kongo)

BB Hiei (Kongo)

Screen (DesRon 4) — RADM Shoji Nishimura

CL Yura (flagship, Nagara)

DesDiv 2 — 4 DDs

DesDiv 9 — 3 DDs

Carrier Group Zuiho (CVL) — 12 Zero fighters, 12 torpedo bombers; 1 DD

Supply Group — 4 oilers, 1 repair ship

Close Support Group — VADM Takeo Kurita

CruDiv 7

CA Kumano (flagship, Mogami)

CA Suzuya (Mogami)

CA Mikuma (Mogami)

CA Mogami (Mogami)

DesDiv 8 — 2 DDs 1 oiler

Transport Group — RADM Raizo Tanaka

12 transports carrying troops

3 patrol boats carrying troops

1 oiler

Escort (DesRon 2) — RADM Tanaka

CL Jintsu (flagship, Jintsu)

DesDiv 15 — 2 DDs

DesDiv 16 — 4 DDs

DesDiv 18 — 4 DDs

Seaplane Tender Group — RADM Riutaro Fujita

Seaplane Tender Div 11

Chitose (CVS) — 16 fighter seaplanes, 4 scout planes

Kamikawa Maru (AV) — 8 fighter seaplanes, 4 scout planes

1 DD;

1 patrol boat carrying troops

Minesweeper Group

4 minesweepers

3 submarine chasers

1 supply ship

2 cargo ships

The Northern Force which was assigned to the invasion and occupation of Attu and Kiska was commanded by Vice Admiral Moshiru Hosogaya included the carriers Ryujo and Junyo which had they accompanied the First Carrier Striking Force might have given the Japanese the edge that they would have needed to recover when that force was destroyed on June 4th.  This force was composed of the following units:

NORTHERN (Aleutians) FORCE (5th Fleet) — VADM Moshiro Hosogaya

Northern Force Main Body

CA Nachi (flagship, Myoko)

Screen —

2 DDs

Supply Group —

2 oilers, 3 cargo ships

Second Carrier Striking Force — RADM Kakuji Kakuta

Carrier Group (CarDiv 4)

CVL Ryujo (flagship, Ryujo) — 16 Zero fighters, 21 torpedo bombers

CV Junyo (Junyo) — 24 Zero fighters, 21 torpedo bombers

Support Group (2nd section, CruDiv 4) —

CA Maya (Takao)

CA Takao (Takao)

Screen (DesDiv 7) —

3 DDs

1 oiler

Attu Invasion Force — RADM Sentaro Omori

CL Abukuma (flagship, Nagara)

DesDiv 21 —

4 DDs

1 minelayer

1 transport carrying troops

Kiska Invasion Force — Capt. Takeji Ono

CruDiv 21 —

CL Kiso

CL Tama 

AMC Asaka Maru (auxiliary cruiser)

Screen (DesDiv 6) —

3 DDs

2 transports carrying troops

Minesweeper Div. 13 —

3 minesweepers

Submarine Detachment — RADM Shigeaki Yamazaki

SubRon 1 — I-9 (flagship)

SubDiv 2 — 3 submarines

SubDiv 4 — 2 submarines

Note all Japanese Fleet information obtained online at http://www.microworks.net/pacific/orders_of_battle/midway_japan.htm

These forces were augmented by a submarine screening force and land based naval air forces stationed at Wake and Kwajalein.

The plan was complicated and depended on the Americans reacting exactly as the plan anticipated them doing.  Yamamoto never expected that the Americans would be waiting for his forces and had knowledge of his plans due to the efforts of U.S. Navy code breakers under the direction of Commander Joseph Rochefort and the Fleet Intelligence Officer Captain Edwin Layton had broken the top secret Japanese Navy JN-25 Code.  Thus despite the massive amount of forces involved the plan was seriously flawed and left the advanced forces vulnerable to unexpected American moves.

Next: Calculated Risk: The American Forces and Strategy at Midway

6 Comments

Filed under History, Navy Ships, US Navy, world war two in the pacific

Iconic and Heroic: The Fletcher Class Destroyers

The USS Fletcher DD-445

If ever a class of warships can define a ship type the destroyers of the Fletcher Class were that. The most numerous of all United States Navy destroyer classes the Navy commissioned 175 of these ships between June 1942 and February 1945.  There were two groupings of ships the 58 round or “high bridge” ships and the 117 square or “low bridged” ships. It was a sound design that would be modified for use in the later Allen M. Sumner and Gearing Class destroyers.  Eleven shipyards produced the ships fast, heavily armed and tough the ships would serve in every theater of the war at sea but would find their greatest fame in the Pacific where many became synonymous with the courage and devotion of their officers and crews.

USS Stevens one of the 6 Fletchers equipped with an aircraft catapult

The ships were a major improvement on previous classes of destroyers and were equal or superior to the destroyers of our allies and our enemies in the war.  At 2050 tons displacement and 2900 tons full load the ships were significantly larger than preceding classes and were designed to mount a superior anti-aircraft armament to compliment their main battery of five 5” 38 caliber dual purpose guns and ten 21” torpedo tubes. 376 feet long and flush decked they were an exceptionally tough class of ships which was demonstrated often in the brutal surface battles in the South Pacific, Leyte Gulf and in the battles with Kamikazes off the Philippines, Iwo Jima, Okinawa and the Japanese mainland.  They were the first destroyers of the US Navy which were built with radar as part of the initial design.

USS O’Bannon DD-450 in 1961

The anti aircraft armament was increased throughout the war. Initially this was composed of: 4 x 40mm Bofors in two twin-mounts and 6 to 13 x 20mm Oerlikon in single-mounts. By June of 1943 new ships of the class mounted 10 x 40mm Bofors in five twin-mounts 7 x 20mm Oerlikon in single-mounts. As the Kamikaze threat became dire ships returning to the United States for refit lost one of their torpedo tube mounts and had their AA armament increased to 14 x 40mm Bofors in three twin and two quad mounts and 12 x 20mm Oerlikon in six twin mounts.  One of the more unusual experiments was to equip six ships with a catapult for a float plane. This eliminated some of their AA guns and one torpedo tube mounting. It was not successful and the mounts were removed before the end of the war.

USS Nicholas in action at Kula Gulf

The first ships of the class saw action in the Solomons during the Guadalcanal campaign.  Fletcher and O’Bannon took part in the Naval Battle of Guadalcanal where O’Bannon was one of several destroyers that ganged up on the Japanese Battleship Hiei at ranges as low as 500 yards causing heavy damage to the Battleship which was sunk by naval aircraft the following day.  The O’Bannon would be awarded the Presidential Unit Citation for her actions around Guadalcanal which read:

O’Bannon

“For outstanding performance in combat against enemy Japanese forces in the South Pacific from October 7, 1942, to October 7, 1943. An aggressive veteran after a year of continuous and intensive operations in this area, the U.S.S. O’BANNON has taken a tremendous toll of vital Japanese warships, surface vessels and aircraft. Launching a close range attack on hostile combatant ships off Guadalcanal on the night of November 13, 1942, the O’BANNON scored three torpedo hits on a Japanese battleship, boldly engaged two other men o’ war with gunfire and retired safely in spite of damage sustained. During three days of incessant hostilities in July 1943, she gallantly stood down Kula Gulf to bombard enemy shore positions in coverage of our assault groups, later taking a valiant part in the rescue of survivors from the torpedoed U.S.S STRONG while under fierce coastal battery fire and aerial bombing attack and adding her fire power toward the destruction of a large Japanese naval force. In company with two destroyers, the O’BANNON boldly intercepted and repulsed nine hostile warships off Vella Lavella on October 7, 1943, destroying two enemy ships and damaging others. Although severely damaged, she stood by to take aboard and care for survivors of a friendly torpedoed destroyer and retired to base under her own power. The O’BANNON’s splendid acheivements and the gallant fighting spirit of her officers and men reflect great credit upon the United States Naval Service.

DESRON 23

Fletcher’s composed DESON 23 the Little Beavers” commanded by Commodore Arleigh “31 knot” Burke. The squadron which covered the initial landings at Bougainville in November 1943 fought in 22 separate engagements during the next four months. During this time the squadron was credited with destroying one Japanese cruiser, nine destroyers, one submarine, several smaller ships, and approximately 30 aircraft.  Under Burke the squadron was composed of USS Foote (DD-511), USS Charles Ausburne (DD-570), USS Spence (DD-512), USS Claxton (DD-571), USS Dyson (DD-572), USS Converse (DD-509) and USS Thatcher (DD-514).  At the Battle of Cape St. George the squadron intercepted a Japanese force of 5 destroyers sinking 3.  At the Battle of Empress Augusta Bay the ships were in action as part of Task Force 39 based around Cruiser Division 12 comprised of the Cleveland Class Light Cruisers Montpelier, Cleveland, Columbia and Denver the took part in the sinking of the Japanese Light Cruiser Sendai and a destroyer.  For their efforts DESRON 23 would be awarded the Presidential Unit Citation which stated:

“For extrordinary heroism in action against enemy Japanese forces during the Solomon Islands Campaign, from November 1, 1943, to February 23, 1944. Boldly penetrating submarine-infested waters during a period when Japanese naval and air power was at its height, Destroyer Squadron TWENTY THREE operated in daring defiance of repeated attacks by hostile air groups, closing the enemy’s strongly fortified shores to carry out sustained bombardments against Japanese coastal defenses and render effective cover and fire support for the major invasion operations in this area. Commanded by forceful leaders and manned by aggressive, fearless crews the ships of Squadron TWENTY THREE coordinated as a superb fighting team; they countered the enemy’s fierce aerial bombing attacks and destroyed or routed his planes; they intercepted his surface task forces, sank or damaged his warships by torpedo fire and prevented interference with our transports. The brilliant and heroic record achieved by Destroyer Squadron TWENTY THREE is a distinctive tribute to the valiant fighting spirit of the individual units in this indomitable combat group and of each skilled and courageous ship’s company.”

USS Johnston DD-557

Fletcher’s served heroically with “Taffy-3” in the Battle of Samar at the Battle of Leyte Gulf.  Taffy-3 which was composed of 6 escort carriers, the Fletcher Class destroyers Hoel, Johnston and Heermann and 4 destroyer escorts was assigned the task of providing close air support for troops ashore and anti-submarine protection for transports.  On the morning of October 25th Admiral Halsey took Third Fleet north to engage a Japanese carrier force believing a Japanese surface force of battleships and cruisers to have withdrawn after being heavily hurt by submarine and air attacks.  The carrier force had few aircraft and was considered a decoy by the Japanese. This left the San Bernardino Strait unguarded and the Japanese surface force which by now was comprised of 4 battleships including the Yamato as well as 6 heavy and 2 light cruisers and 11 destroyers doubled back going through the strait during the early morning hours of the 25th.  Just before dawn a patrol aircraft spotted the Japanese force and at 0659 Yamato opened fire on the task group.

USS Hoel DD-533

The three Fletcher’s and the Destroyer escort Samuel B Roberts were launched into a suicidal counter-attack against the Japanese force. Led by Johnston under the command of Ernest E. Evans the little ships engaged their vastly superior foe as the escort carriers edged away as they launched and recovered their aircraft to keep a continuous air assault on the Japanese force.  Johnston scored numerous hits with her 5” guns on the Heavy Cruiser Kumano and when she reached torpedo range launched her 10 “fish” one of which blew off Kumano’s bow and another of which crippled Kumano’s sister Suzuya before she was hit in quick succession by a 14” shell from the Battleship Kongo which hit her engine room and three 6” shells from Yamato which struck her bridge.  Evans kept the crippled ship in the fight drawing fire away from other attacking destroyers and fending off a Japanese destroyer squadron that was trying to flank the carriers. Johnston continued to be hit and was abandon at 0945 sinking 25 minutes later with 186 of her crew.  Evans did not survive and was awarded the Medal of Honor.

USS Heermann DD-532 in action at Samar

Hoel under the command of Commander Leon S. Kintberger took on the Battleship Kongo and a column of cruisers lead by the Heavy Cruiser HaguroHoel’s torpedo attack on Kongo forced that ship to turn away and torpedo hits were claimed on the Haguro, although that ship remained in action and the Japanese denied any torpedo damage from the attack. The Japanese concentrated on Hoel sinking her at 0855 taking all but 86 of her crew to a watery grave.

Heermann under Commander Amos Hathaway threw herself into the fight engaging Japanese battleships and cruisers. Heermann engaged Heavy Cruiser Chikuma with her guns while mounting a torpedo attack on Haguro. She then attacked the Japanese battleships directly engaging Haruna and forcing Yamato to head away from the action for 10 minutes as she was bracketed by two of Heermann’s torpedoes running on a parallel course.  She engaged the other battleships at such close range that they could not hit her and broke off to intercept a column of cruisers.  Once again she engaged Chikuma in a bloody duel with both ships taking heavy damage. Crippled by a series of 8” shell hits from the heavy cruisers Heermann was down heavily at the bow, so much so that her anchors dragged the water. Carrier aircraft joined the battle and Chikuma withdrew from the fight and sank during her withdraw. Heermann then engaged Heavy Cruiser Tone before that ship, also damaged by air attack withdrew from the fight.  Though she was heavily damaged the Heermann was the only destroyer to survive the action.  Despite their terrible losses the ships and aircraft of Taffy-3 sank 3 heavy cruisers and a destroyer and heavily damaged 3 battleships and 3 heavy cruisers.

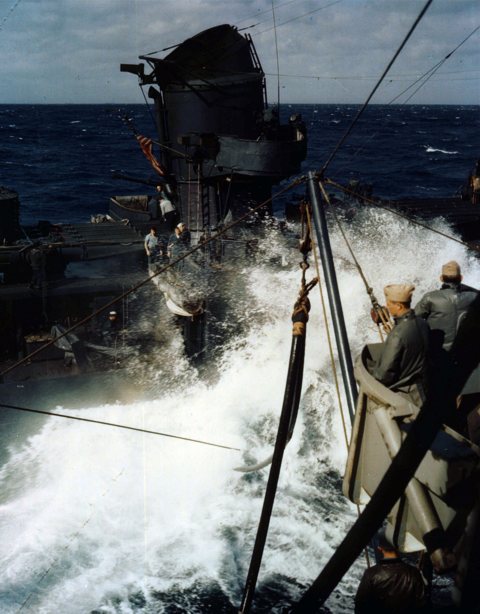
Just a bit wet, USS Halsey Powell unrep with USS Wisconsin

For their heroic actions which kept the Japanese from getting to the vulnerable transports Taffy-3 including the valiant destroyers Johnston, Hoel, Heerman and Destroyer Escort Samuel B Roberts was awarded the Presidential Unit Citation which read:

“For extraordinary heroism in action against powerful units of the Japanese Fleet during the Battle off Samar, Philippines, October 25, 1944. Silhouetted against the dawn as the Central Japanese Force steamed through San Bernardino Strait towards Leyte Gulf, Task Unit 77.4.3 was suddenly taken under attack by hostile cruisers on its port hand, destroyers on the starboard and battleships from the rear. Quickly laying down a heavy smoke screen, the gallant ships of the Task Unit waged battle fiercely against the superior speed and fire power of the advancing enemy, swiftly launching and rearming aircraft and violently zigzagging in protection of vessels stricken by hostile armor-piercing shells, anti-personnel projectiles and suicide bombers. With one carrier of the group sunk, others badly damaged and squadron aircraft courageously coordinating in the attacks by making dry runs over the enemy Fleet as the Japanese relentlessly closed in for the kill, two of the Unit’s valiant destroyers and one destroyer escort charged the battleships point-blank and, expending their last torpedoes in desperate defense of the entire group, went down under the enemy’s heavy shells as a climax to two and one half hours of sustained and furious combat. The courageous determination and the superb teamwork of the officers and men who fought the embarked planes and who manned the ships of Task Unit 77.4.3 were instrumental in effecting the retirement of a hostile force threatening our Leyte invasion operations and were in keeping with the highest traditions of the United States Naval Service.”

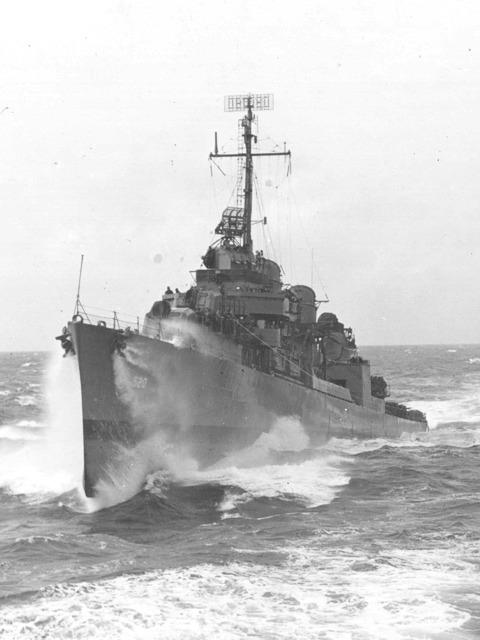
USS Isherwood (DD-520) underway in heavy weather as she comes alongside the heavy cruiser USS Tuscaloosa (CA-37) in August 1943. National Archives and Records Administration. Photo # 80-G-79429. [Navsource]

During the war 19 of the class were lost and 6 damaged so badly that they were not repaired. 44 of the ships were awarded 10 battle stars or more while 19 were awarded Naval Unit Commendations and 16 Presidential Unit Citations.  Following the war all were decommissioned and placed in reserve. Many were re-commissioned during the Korean War and served through Vietnam. Some of these ships were modernized with newer ASW weapons and re-designated Escort Destroyers (DDE) while others had their air search radar modernized and were re-classified as Radar Picket Destroyers or (DDR). The last Fletcher in US Service decommissioned in 1971.  52 were sold or transferred under military assistance programs to other navies in the 1950s.  The ships served well and the last one in active service the Mexican Navy Destroyer Cuitlahuac the former USS John C Rodgers DD-874 was decommissioned in 2001.

Ex USS Twinning in Republic of China Navy Service, note weapon modifcations

Zerstörer Z-1 Rommel

USS Kidd as Museum and Memorial

Four are currently open as memorial ships the USS Cassin Young DD-793 at Buffalo NY, the USS The Sullivans DD-537 at Boston MA and USS Kidd DD-661 at Baton Rouge LA can be seen in the United States. The Cassin Young is berthed at the old Charlestown Naval Yard in Boston across the pier from the Frigate USS Constitution.  The former the Greek destroyer Velos the ex-USS Charette DD-581 is located in Athens.  The John Rodgers has been purchased by a group in the US but is currently laid up in Mexico and her fate is undecided. I hope that she too will be saved for future generations.

The Fletcher Class really symbolizes more than any class of destroyer the classic look of what a destroyer should be. Their clean lines and classic design are iconic not just in this country but in the 15 other countries that they would serve in during the following years.  Their amazing record and service in World War Two and in the following years in both the US Navy and the navies of our Allies is one that will probably never be surpassed.

I have visited the Cassin Young in Boston; it is well worth the time to see. I hope that I might see The Sullivans and Kidd in the coming years.

The Zerstörer Z-4 ex USS Dyson in heavy seas

I salute the ships of the class and the officers and sailors that served on them in peace and war.

Peace

Padre Steve+

5 Comments

Filed under History, Navy Ships, US Navy, world war two in the pacific