Tag Archives: ijn shokaku

The Great Marianas Turkey Shoot

U.S. Navy personnel observe the Air Battle from a Carrier

The Battle of the Philippine Sea of 19-20 June 1944 was the largest carrier battle in history.  Twenty four aircraft carriers, 15 American and 9 Japanese embarking over 1400 aircraft dueled in the Central Pacific in a battle that so decimated Japanese Naval Aviation that it never recovered. The battle and the subsequent fall of Saipan brought down the government of General Tojo and was the beginning of the collapse of the Japanese Empire and the “Greater Asia Co-Prosperity Sphere.”  

http://dsc.discovery.com/videos/destroyed-in-seconds-marianas-turkey-shoot.html

In late 1943 the Japanese realized that they needed to recover the initiative in the Pacific.  Between the Battle of the Coral Sea and the Battle of Santa Cruz Japanese Naval aviation suffered crippling losses especially among the elite pilots and aircrews with who they had begun the war.  These losses were compounded when the Navy attempted to support the operations of the Army to defend the Solomons and New Guinea.  Squadrons sent to battle the United States Navy, Marine Corps and Army Air Corps suffered at the hands of the every more skilled and well equipped American fighter squadrons the victims of which included Admiral Isoruku Yamamoto the Commander of the Combined Fleet when the Betty bomber that he was traveling on was ambushed by U.S. Army Air Corps P-38 Lightening fighters.

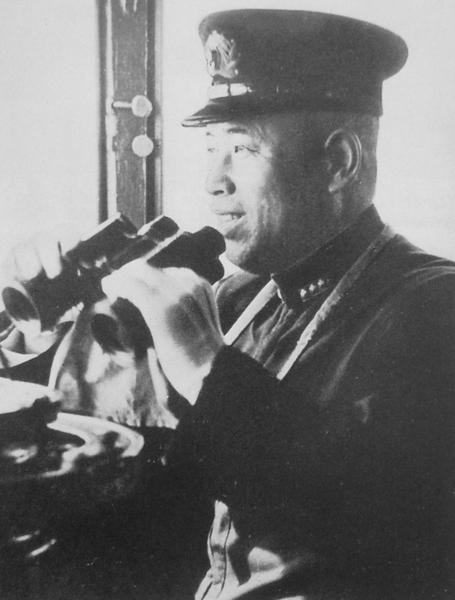
Vice Admiral Jisaburō Ozawa

By late 1943 the Japanese were attempting to train new pilots and aircrews to man the carriers of the Combined Fleet’s Carrier Striking Forces.  Admiral Soemu Toyoda, the new commander of the Combined Fleet and its third commander in less than a year developed “Plan A-Go” as a means to mass carrier and land based aviation assets to defeat the Fast Carrier Task Forces of the United States Navy.  The rebuilt Carrier Striking Groups built around 9 carriers embarking 473 aircraft was commanded by Vice Admiral Jisaburō Ozawa who had taken over from Vice Admiral Chuichi Nagumo.

D4Y3 “Judy” Dive Bomber

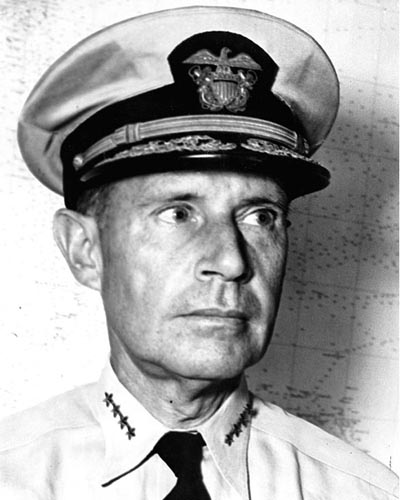
The Japanese discerned the intentions of the Americans when American Carrier aircraft struck Saipan and Guam. The Japanese had expected the Americans to strike further south and the Marianas had few land-based aircraft in the area. Toyoda made the decision to engage the Americans and ordered the fleet to attack. American submarines discovered the gathering Japanese forces. The Japanese forces were assembled by the 17th and by the 18th the 5th Fleet under the command of Admiral Raymond Spruance spearheaded by Task Force 58 Commanded by Vice Admiral Marc Mitscher had assembled west of Saipan to meet the Japanese.  The Americans fielded 15 carriers including 9 Fleet Carriers of which 6 were the new Essex Class Fleet Carriers which embarked 956 aircraft.

The F6F Hellcat cemented its place as the premier fighter plane of the Pacific war during the “Turkey Shoot”

The Americans held both a quantitative and qualitative advantage against the Japanese. The American fighter squadrons were equipped with the F6F Hellcat which was far superior to the now obsolescent Japanese Zero fighters and their pilots and aircrews were now more experienced and proficient than the newly minted Japanese aviators who by and large had little combat experience and were flying inferior aircraft.  The Japanese had not planned for a long war and had done little to systemically address the heavy losses that their force experienced during 1942 and 1943 at Coral Sea, Midway, Eastern Solomons, Santa Cruz and in the Solomons campaign.

Vice Admiral Marc Mitscher aboard the USS Lexington

Mitscher desired to move aggressively against the Japanese. However he was overruled by Spruance who acting on the advice of his Battle Line Commander Vice Admiral Willis Lee decided that a possible night surface action with the Japanese was not desirable. Spruance instead directed Mitscher to be ready to defend against Japanese air strikes knowing that his carriers and carrier based air groups was more than a match for the Japanese air groups.   Spruance has been criticized for his decision but the words of Willis Lee, a veteran of the Naval Battle of Guadalcanal where he defeated a Japanese force sinking the Battleship Kirishima.  He prevailed in his flagship the USS Washington but losing three of four escorting destroyers and seeing his second battle wagon the USS South Dakota heavily damaged. A night surface engagement was not worth the risk as in Lee’s eyes it evened the playing field for the Japanese and took away the American air power advantages.

A Japanese aircraft goes down in flames

The Japanese began the action on the 19th sending successive attack waves against Task Force 58. They were met by massed formations of Hellcats vectored in by air controllers in the Combat Information Centers of the American carriers using their superior air search radar systems.  In less than two hours well over 200 Japanese aircraft were downed by the Hellcats.  Lieutenant Alexander Vraicu shot down 6 “Judy” dive bombers in minutes before low on fuel he returned to the USS Lexington.

Lieutenant Alexander Vraicu holds up six fingers on board the USS Lexington

While the Hellcats were chewing up the Japanese squadrons the American submarines USS Albacore and USS Cavalla each sank a Japanese Fleet Aircraft Carrier.  The Albacore hit the Ozawa’s flagship, the new Tiaho with a torpedo which caused minimal damage, but ruptured fuel lines. The Japanese damage control officer opened vents in the ship which allowed the fumes to spread throughout the carrier. They were ignited by a generator causing massive explosions and forcing Ozawa to abandon his flagship. Tiaho would sink by late afternoon after being ripped apart by a series of massive explosions taking with her 1650 of 1750 officers and crew. Cavalla hit the Pearl Harbor veteran Shokaku with a spread of three torpedoes causing that ship to burst into flames with aircraft and ordnance adding to the conflagration. A massive explosion ripped through the ship causing her to sink with a loss of over 1200 officers and crew.

The Japanese flagship Tiaho and her killer the USS Albacore

Toyoda desired that Ozawa retire from the battle before he suffered more losses but Ozawa wanted to stay around and hit the Americans with everything that he had left. The Americans sailed west during the night to seek out the Japanese Fleet. It took the majority of the day to find the Japanese. With only 75 minutes of daylight remaining Mitscher launched a strike despite the risk to his aircrew the majority whom were not trained in night landings.  The American strike sank the carrier Hiyo and two tankers and damaged the carriers Zuikaku, Chitoyda and Junyo as well as the battleship Haruna.  By the end of the day Ozawa had 35 aircraft in flyable condition.

The Japanese Fleet under attack, carrier Zuikaku and two destroyers on June 20th

The final part of the drama was the return of the American strike group to the carriers. Knowing that if he maintained darken ship he would lose many aircraft and the men that flew them Mitscher ordered that the fleet turn on its lights. This act though incredibly risky helped bring the majority of the aircraft to land or ditch near the task force.  The Americans lost less than 100 aircraft many due to the night landings and many of the aircrew were rescued. The Japanese also lost nearly 200 land based aircraft.

Admiral Raymond Spruance

The battle was the death-kneel of Japanese Naval Aviation. Later in the year the carriers again under Ozawa sailed against the Americans only this time they were a decoy force at the Battle of Leyte Gulf, a role that they succeeded in admirably. The American carriers now had free run of the Pacific only opposed by land based aircraft many used in a Kamikaze role until the end of the war. These would cause fearful losses among the American ships heavily damaging a number of carriers.

The battle is often forgotten by due to its proximity to the Normandy landings but was a significant step in the fight against Japan. The islands captured by the Americans, Saipan, Tinian and Guam would provide major sea and air staging areas for the final assault against Japan. Tinian would become the base of many Army Air Corps B-29 “Superfortress” bombers including those that dropped the Atomic bombs less than 14 months later. It was a turning point both militarily and politically. With the fall of the Tojo government the Japanese leaders began to slowly tell the truth about wartime setbacks and losses to a people that it had lied to since their invasion of China and occupation of Mongolia.  It was a setback that even Tojo and the highest leadership of Japan knew that they could not recover.

5 Comments

Filed under History, Military, US Navy, world war two in the pacific

An Invincible Fleet and a Flawed Plan: The Japanese at Midway

Note: This is the first of a series of articles coming over the next few days about the Battle of Midway, a major turning point of the Second World War.

The Battleship Yamato, Flagship of the Combined Fleet and symbol of Japanese Naval Power

The Imperial Japanese Navy under the command of Admiral Isoruku Yamamoto had been humiliated. On April 18th 1942 16 B-25 bombers under the command of Colonel Jimmy Doolittle were launched from the deck of the USS Hornet and bombed Tokyo.  Though the physical damage was insignificant the psychological impact was massive on the Japanese military establishment. Yamamoto and his deputy Rear Admiral Matome Ugaki had explored the possibility of attacking Midway in the early months of 1942 as the Japanese armed forces competed with each other to determine an overall strategy for the war effort. The Army was insistent on a China strategy while the Navy preferred expansion in the Western, South and Central Pacific.  Yamamoto’s idea envisioned seizing Midway and using it as a forward base from which an invasion of Hawaii could be mounted as well as the bait to draw the carrier task forces of the U.S. Navy into battle and destroy them.

Admiral Isoruku Yamamoto, CinC Combined Fleet

The Japanese certainly had the forces to accomplish the mission outnumbering the U.S. Navy which had taken heavy losses at Pearl Harbor and in the Far East.  Following the Doolittle raid Yamamoto went ahead with the plan to invade Midway. The operation, named MI was coupled with an invasion of the islands of Attu and Kiska in the Aleutians which would form a picket line to prevent future attacks on the Japanese mainland. Fuchida

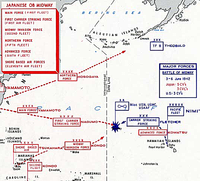
Yamamoto’s plan was not without its critics, the majority of the Staf of the First Air Fleet embarked on the First Carrier Striking Force was not in favor including the leader of the Pearl Harbor attack Commander Mitsuo Fuchida who considered it “grammar school strategy.”   Despite objections from them as well as his Fleet Operations Officer Yamamoto directed that the plan be implemented.  The plan was to have the First Carrier Striking Force attack Midway and reduce its defenses so that the Invasion Force could undertake the task of invading and occupying Midway.  Supporting these forces was the Main Body built around Battleship Division One included Yamamoto’s flagship the 72,000 ton behemoth Yamato.  Another strong force was assigned to the Aleutian operation. The task forces were spread out across the North Pacific and would not able to provide mutual support to each other in a timely manner.

Japanese Forces were organized in the following manner.

Main Body, Admiral Yamamoto

BatDiv 1, Admiral Yamamoto

BB Yamato (flagship, Yamato), Captain

BB Nagato (Nagato), Captain Hideo Yano

BB Mutsu (Nagato), Captain Teijiro Yamazumi

Carrier Group, Captain Kaoru Umetani

CVL Hosho (Hosho), Captain Umetani

Air Unit (8 bombers), Lieutenant Yoshiaki Irikiin

DD Yukaze (Minekaze), Lieutenant Commander Shizuka Kajimoto

Special Force, Captain Kaku Harada

Chiyoda (seaplane carrier, Chitose), Captain Harada

Nisshin (seaplane carrier, Nisshin), Captain Katsumi Komazawa

Screen (DesRon 3), RADM Shintaro Hashimoto

CL Sendai (flagship, Jintsu), Captain Nobue Morishita

DesDiv 11, Captain Kiichiro Shoji

DD Fubuki (Fubuki), Captain Shizuo Yamashita

DD Shirayuki (Fubuki), Captain Taro Sugahara

DD Hatsuyuki (Fubuki), Captain Lieutenant Commander Junnari Kamiura

DD Murakumo (Fubuki), Captain Commander Hideo Higashi

DesDiv 19, Captain Ranji Oe

DD Isonami (Fubuki), Commander Ryokichi Sugama

DD Uranami (Fubuki), Commander Tsutomu Hagio

DD Shikinami (Fubuki), Commander Akifumi Kawahashi

DD Ayanami (Fubuki), Commander Eiji Sakuma

1st Supply Unit, Captain Shigeyasu Nishioka

Naruto (Oiler), Captain Nishioka

Toei Maru (Oiler)

It was Yamamoto’s plan to use this force to polish off U.S. Forces that would only enter the fight after he had taken Midway. Despite the success of his carrier task forces at his heart Yamamoto was still a Battleship Sailor and believed that his battleships would be the deciding factor in the final destruction of the U.S. Navy forces in the Pacific.  This force could be augmented by the Aleutian Guard Force, detached from the Main Body under the command of Vice Admiral Shiru Takasu and was composed of the following fleet units:

GUARD (Aleutians Screening) FORCE, VADM Shiro Takasu in Hyuga

Chief of Staff, Rear Admiral Kengo Kobayashi

BatDiv 2

BB Hyuga (flagship, Hyuga), Captain Chiaki Matsuda

BB Ise (Hyuga), Captain Isamu Takeda

BB Fuso (Fuso), Captain Mitsuo Kinoshita

BB Yamashiro (Fuso), Captain Gunji Kogure

Screen, RADM Fukuji Kishi

CruDiv 9, Rear Admiral Kishi

CL Kitakami ( flagship, Kuma), Captain Saiji Norimitsu

CL Oi (Kuma), Captain Shigeru Narita

DesDiv 20, Captain Yuji Yamada

DD Asagiri (Fubuki), Commander Nisaburo Maekawa

DD Yugiri (Fubuki), Captain Masayoshi Motokura

DD Shirakumo (Fubuki), Commander Toyoji Hitomi

DD Amagiri (Fubuki), Captain Buichi Ashida

DesDiv 24, Captain Yasuji Hirai

DD Umikaze (Shiratsuyu), Commander Nagahide Sugitani

DD Yamakaze (Shiratsuyu), Commander Shuichi Hamanaka

DD Kawakaze (Shiratsuyu), Commander Kazuo Wakabayashi

DD Suzukaze (Shiratsuyu), Commander Kazuo Shibayama

DesDiv 27, Captain Matake Yoshimura

DD Ariake (Hatsuharu), Commander Shoichi Yoshida

DD Yugure (Hatsuharu), Commander Kiyoshi Kamo

DD Shigure (Shiratsuyu), Commander Noboru Seo

DD Shiratsuyu (Shiratsuyu), Lieutenant Commander Kimmatsu Hashimoto

2nd Supply Unit, Captain Matsuo Eguchi

San Clemente Maru (oiler), Captain Eguchi

Toa Maru (oiler)

The force that was the true heart of the Japanese Navy in early 1942 was the First Carrier Striking Force which at Pearl Harbor and in the months following had run roughshod over all Allied opposition.  Initially composed of 6 flattops the force was reduced to four when the Shokaku was heavily damaged and Zuikaku’s air group decimated at the Battle of the Coral Sea on 8 May 1942.  Nevertheless it was still a formidable and experienced force in its own right.  Commanded by Vice Admiral Chuichi Nagumo it was composed of the following units:

FIRST CARRIER STRIKING FORCE (1st Air Fleet), VADM Chuichi Nagumo

Carrier Group, VADM Nagumo

CarDiv 1

CV Akagi  (flagship, Akagi) 21 Zero fighters, 21 dive bombers, 21 torpedo bombers

CV Kaga (Kaga) 21 Zero fighters, 21 dive bombers, 30 torpedo bombers

CarDiv 2 — RADM Tamon Yamaguchi

CV Hiryu (flagship, Hiryu) 21 Zero fighters, 21 dive bombers, 21 torpedo bombers

CV Soryu (Hiryu) 21 Zero fighters, 21 dive bombers, 21 torpedo bombers

Support Group — RADM Hiroaki Abe CruDiv 8

CA Tone (flagship, Tone)

CA Chikuma (Tone)

2nd Section, BatDiv 3 —

BB Haruna (Kongo)

BB Kirishima (Kongo)

Screen (DesRon 10) — RADM Susumu Kimura

CL Nagara (flagship, Nagara)

DesDiv 4 — 4 DDs

DesDiv 10 — 3 DDs

DesDiv 17 — 4 DDs

Supply Group — 5 oilers, 1 DD

The Invasion Force under the command of Vice Admiral Nobutake Kondo was a formidable surface strike group in its own right and was built around 2 Fast Battleships, 9 Heavy Cruisers and a light carrier.

MIDWAY INVASION FORCE, (2nd Fleet), VADM Nobutake Kondo

Invasion Force Main Body

CruDiv 4 (less 2nd section)

CA Atago (flagship, Takao),

CA Chokai (Takao)

CruDiv 5 (less 2nd section)

CA Myoko (Myoko)

CA Haguro (Myoko)

BatDiv 3 (less 2nd section) —

BB Kongo (Kongo)

BB Hiei (Kongo)

Screen (DesRon 4) — RADM Shoji Nishimura

CL Yura (flagship, Nagara)

DesDiv 2 — 4 DDs

DesDiv 9 — 3 DDs

Carrier Group Zuiho (CVL) — 12 Zero fighters, 12 torpedo bombers; 1 DD

Supply Group — 4 oilers, 1 repair ship

Close Support Group — VADM Takeo Kurita

CruDiv 7

CA Kumano (flagship, Mogami)

CA Suzuya (Mogami)

CA Mikuma (Mogami)

CA Mogami (Mogami)

DesDiv 8 — 2 DDs 1 oiler

Transport Group — RADM Raizo Tanaka

12 transports carrying troops

3 patrol boats carrying troops

1 oiler

Escort (DesRon 2) — RADM Tanaka

CL Jintsu (flagship, Jintsu)

DesDiv 15 — 2 DDs

DesDiv 16 — 4 DDs

DesDiv 18 — 4 DDs

Seaplane Tender Group — RADM Riutaro Fujita

Seaplane Tender Div 11

Chitose (CVS) — 16 fighter seaplanes, 4 scout planes

Kamikawa Maru (AV) — 8 fighter seaplanes, 4 scout planes

1 DD;

1 patrol boat carrying troops

Minesweeper Group

4 minesweepers

3 submarine chasers

1 supply ship

2 cargo ships

The Northern Force which was assigned to the invasion and occupation of Attu and Kiska was commanded by Vice Admiral Moshiru Hosogaya included the carriers Ryujo and Junyo which had they accompanied the First Carrier Striking Force might have given the Japanese the edge that they would have needed to recover when that force was destroyed on June 4th.  This force was composed of the following units:

NORTHERN (Aleutians) FORCE (5th Fleet) — VADM Moshiro Hosogaya

Northern Force Main Body

CA Nachi (flagship, Myoko)

Screen —

2 DDs

Supply Group —

2 oilers, 3 cargo ships

Second Carrier Striking Force — RADM Kakuji Kakuta

Carrier Group (CarDiv 4)

CVL Ryujo (flagship, Ryujo) — 16 Zero fighters, 21 torpedo bombers

CV Junyo (Junyo) — 24 Zero fighters, 21 torpedo bombers

Support Group (2nd section, CruDiv 4) —

CA Maya (Takao)

CA Takao (Takao)

Screen (DesDiv 7) —

3 DDs

1 oiler

Attu Invasion Force — RADM Sentaro Omori

CL Abukuma (flagship, Nagara)

DesDiv 21 —

4 DDs

1 minelayer

1 transport carrying troops

Kiska Invasion Force — Capt. Takeji Ono

CruDiv 21 —

CL Kiso

CL Tama 

AMC Asaka Maru (auxiliary cruiser)

Screen (DesDiv 6) —

3 DDs

2 transports carrying troops

Minesweeper Div. 13 —

3 minesweepers

Submarine Detachment — RADM Shigeaki Yamazaki

SubRon 1 — I-9 (flagship)

SubDiv 2 — 3 submarines

SubDiv 4 — 2 submarines

Note all Japanese Fleet information obtained online at http://www.microworks.net/pacific/orders_of_battle/midway_japan.htm

These forces were augmented by a submarine screening force and land based naval air forces stationed at Wake and Kwajalein.

The plan was complicated and depended on the Americans reacting exactly as the plan anticipated them doing.  Yamamoto never expected that the Americans would be waiting for his forces and had knowledge of his plans due to the efforts of U.S. Navy code breakers under the direction of Commander Joseph Rochefort and the Fleet Intelligence Officer Captain Edwin Layton had broken the top secret Japanese Navy JN-25 Code.  Thus despite the massive amount of forces involved the plan was seriously flawed and left the advanced forces vulnerable to unexpected American moves.

Next: Calculated Risk: The American Forces and Strategy at Midway

6 Comments

Filed under History, Navy Ships, US Navy, world war two in the pacific

They Held the Line: The USS Yorktown CV-5, USS Enterprise CV-6 and USS Hornet CV-8, Part Two the Hornet

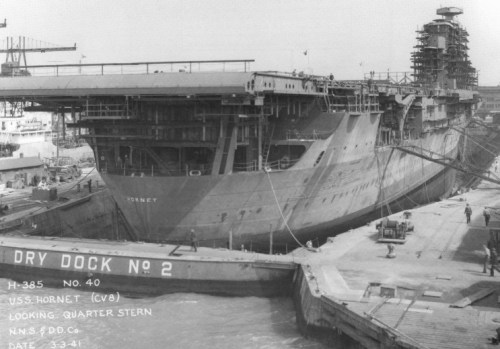
USS Hornet CV-8 Building at Newport News VA

This is part two of a three part series about the USS Yorktown Class Aircraft Carriers. Part one serves as an introduction as well as the story of the lead ship of the Class, the USS Yorktown CV-5.  Part One about the Yorktown is located here: https://padresteve.wordpress.com/2009/12/27/they-held-the-line-the-uss-yorktown-cv-5-uss-enterprise-cv-6-and-uss-hornet-cv-8-part-one/

Hornet as Completed off Hampton Roads shortly after Her Commissioning

The USS Hornet CV-8 was the third ship of the Yorktown Class and is sometimes referred to as her own one ship Hornet Class.  Laid down on 25 September1939 under the Naval Expansion act of May 17th 1938, Hornet was part of the pre-war naval build up authorized by President and Congress.  The previous Yorktown design was used to speed construction.  Hornet was slightly modified from her sisters Yorktown and Enterprise being 15 feet longer, 5 feet wider in the beam and displacing about 1000 tons more than her near sisters.  Her anti-aircraft armament was also slightly improved.  As with her near sisters Hornet had good protection except that her underwater protection was weak.  However, as would be born out in combat Hornet like her sisters would prove to be extraordinarily tough.

Hornet in Rough Seas Preparing to Launch the Doolittle Raid

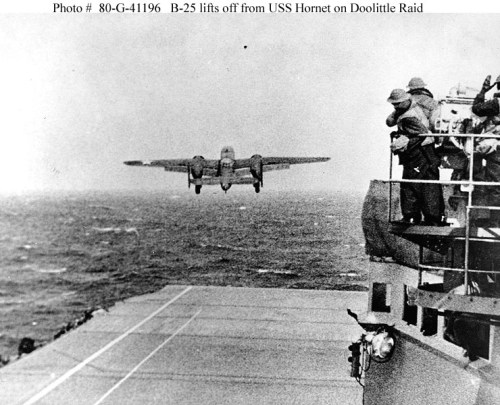
Hornet was launched on 14 December 1940 and commissioned 25 October 1941 with Naval Aviation pioneer Captain Marc A Mitscher Commanding. Hornet conducted her initial training and air group qualifications while operating out of Norfolk.  On February 2nd two Army Air Corps B-25 Medium Bombers were loaded aboard.  As Hornet put to sea the bombers were launched to the astonishment of the crew. Hornet departed Norfolk for the Pacific where she embarked 16 B-25s under the command of Colonel Jimmy Doolittle.  Hornet’s own air group was stowed in the hanger bay.  On April 2nd Hornet departed from San Francisco for a rendezvous with Admiral Halsey’s Task Force 16 and her sister ship Enterprise.  As the ship departed Mitscher informed the crew of their mission.  Hornet would launch Colonel Doolittle’s aircraft against the heart of the Imperial Japanese Empire, Tokyo.

Hornet Launching B-25

The plan was for the task force to sail to 400 miles from Japan and launch the bombers. Enterprise was to provide air cover for the task force while Hornet’s air group was inaccessible while the bombers remained aboard.  On the morning of 18 April the task force was spotted by a Japanese patrol boat.  The craft was quickly dispatched by the heavy cruiser USS Nashville but not before the craft had reported the presence of the task force.  Though the task force was still 600 some miles from Japan Halsey ordered that Doolittle’s aircraft be launched against Tokyo.  The attack while militarily insignificant came as a major surprise to the Japanese who anticipating a raid by naval aircraft believed that any attack could not take place until the following day.  Even more significantly the attack stunned the Japanese military establishment, especially the Navy. The attack would provoke Admiral Yamamoto to attack Midway in order to draw out the American carriers and destroy them.

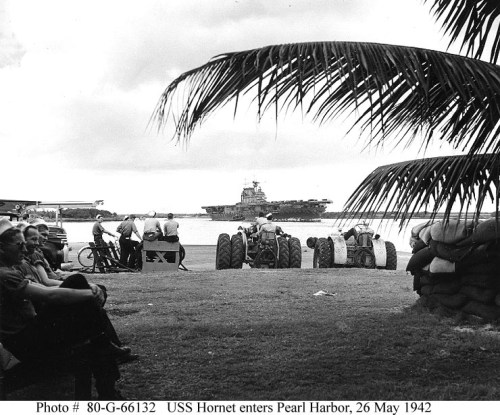
Hornet Arrives at Pearl Harbor Before Midway

Hornet along with Task Force 16 sailed back to Pearl Harbor arriving a week later and the mission would remain secret for over a year.  The task force steamed to assist the Yorktown and Lexington at the Battle of Coral Sea but that battle was over before they could arrive.  The task force returned to Pearl Harbor on the 26th of May and sail on the 28th for Midway.  Hornet’s air group was plagued with bad luck.  Torpedo Squadron 8, or Torpedo 8 commanded by LCDR John Waldron found and attacked the Japanese task force losing all aircraft and all pilots save one.  6 new TBF Avengers from her air group operating from Midway met with heavy losses in their attack against the Japanese.  Only one pilot from Torpedo 8 with Waldron’s group survived, Ensign George Gay.  Hornet’s dive bombers followed bad reports of the location of the Japanese carriers and took no part in the action.  Many would have to ditch in the ocean as they ran out of fuel.  Hornet’s air group would help sink the Japanese Heavy Cruiser Mikuma and heavily damaged Mogami on the 6th.  The Battle of Midway was one of the major turning points of the war.  The Japanese had lost six carriers which had attacked Pearl Harbor along with their aircraft and many of their highly trained pilots and flight crews. Coupled with their losses at Coral Sea the Japanese suffered losses that they could ill afford and could not easily replace.

Following Midway Hornet had new radar installed and trained out of Pearl Harbor until order to the Southwest Pacific to take part in the struggle for Guadalcanal.  By the time she arrived she was the only operational American carrier in the Pacific. Enterprise had suffered bomb damage at the Battle of Easter Solomons on August 24th; Saratoga was damaged by a submarine torpedo on August 31st and the Wasp was sunk by a submarine on September 15th.  In the space of 3 weeks the United States Navy had lost 3/4ths of its operational carriers in the waters off of Guadalcanal. Hornet now faced the Japanese alone, providing much of the badly needed air support for the Marines fighting ashore.

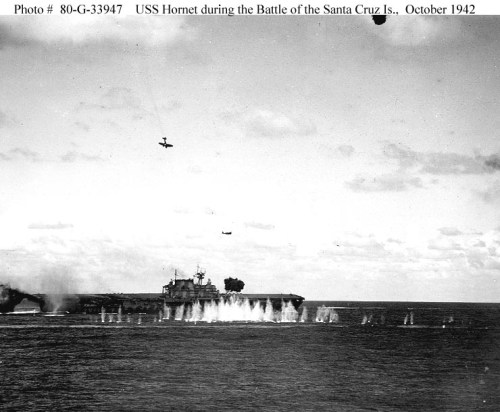
Hornet Under Attack: Note “Val” Dive Bomber about to crash ship

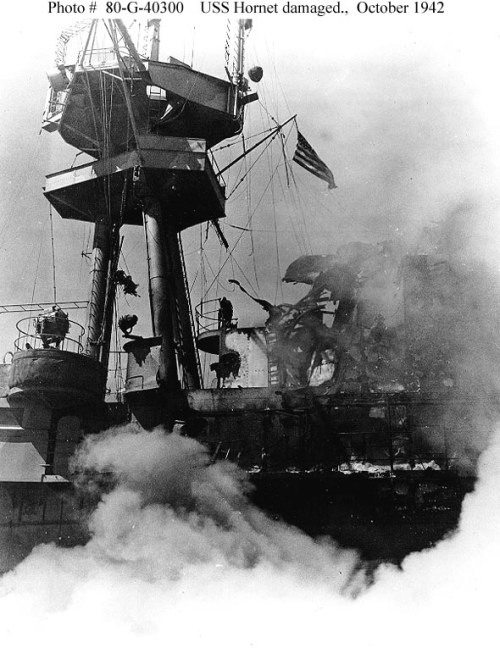
The Enterprise rejoined Hornet following hasty repairs off the New Hebrides Islands on October 24th.  On the 26th they joined battle with a Japanese task force of 4 carriers centered on the veterans Shokaku and Zuikaku. The Hornet’s aircraft attacked and seriously damaged Shokaku even as Japanese torpedo planes and dive bombers launched a well coordinated attack against Hornet. Hornet was hit by three bombs, two torpedoes and had two Vals dive into her with their bombs.  On fire and without power her damage control parties fought to regain control of the ship and extinguish the fires that blazed aboard her.

Hornet’s Damaged Island and Main Mast

Assisted by the heavy cruiser Northampton which took her in tow her crew brought the fires under control and were close to restoring power when another Japanese strike group found her and put another torpedo into her.  With this hit Hornet’s list increase and she was abandoned even as she was hit by another bomb.  With Japanese ships in the area it was decided to scuttle the ship. Escorting destroyers hit her with 9 torpedoes and over 400 rounds of 5” shells.  As Hornet blazed in the night her escorts withdrew and Japanese forces after attempting to take her under tow put four of their 24” “Long Lance” torpedoes into the doomed ship at long last sinking her.

Hornet Being Abandoned by Her Crew

In her last fight Hornet’s aircraft along with those of Enterprise mauled the air groups of Shokaku and Zuikaku again inflicting irreplaceable losses among their experienced air crews.  In the battle Hornet was hit by 4 bombs, two aircraft, 16 torpedoes and over 400 rounds of 5” shells, more hits than were sustained by any other US carrier in a single action during the war.  She was stuck from the Navy list on 13 January 1943 and her gallant Torpedo 8 was awarded the Navy Presidential Unit Citation “for extraordinary heroism and distinguished service beyond the call of duty” in the Battle of Midway.  Her name was given to the Essex Class carrier CV-12. The new Hornet served throughout the war and served well into the Cold War.  She now rests as a Museum ship at Alameda California.

The USS Hornet Association website is here:  http://www.usshornetassn.com/

The Museum site is here: http://www.uss-hornet.org/

If you liked this article you might want to also read the following articles on this site:

The Battleships of Pearl Harbor

The Transitional Carriers: USS Ranger CV-4 and USS Wasp CV-7

The First Aircraft Carriers Part One: The First American Flattops- Langley, Lexington and Saratoga

The Treaty Cruisers: A Warship Review

5 Comments

Filed under History, Military, Navy Ships, world war two in the pacific

The First Aircraft Carriers Part One: The First American Flattops- Langley, Lexington and Saratoga

saratoga aircraft approach for landingAircraft over Saratoga

Note: This is the first in a series on the early aircraft carriers.  Two others will follow on the British and Japanese carriers.  My dad was a Chief Petty Officer in Naval Aviation.  As such I grew up around Naval Air Stations, Squadrons and of course Aircraft Carriers.  My dad retired off of the USS Hancock CVA-19 in 1974.  I spent two weeks underway on USS Coral Sea CV-43 as a NJROTC Cadet in the summer of 1976.  It was an experience that I will never forget.  While on the Cruiser USS Hue City CG-66 we deployed with the USS John F Kennedy CV-67 for Operation Enduring Freedom.  There is something about the power and majesty of the modern carriers at the same time there is a sense of timelessness in the first aircraft carriers.  Three of the first four American ships were converted from other platforms.  As a kid, a young adult and even now I am fascinated by all things Navy, especially ships that made history.  Here is my look at the first American Aircraft Carriers.

The United States did not invent the aircraft carrier although Eugene Ely flew an aircraft onto and off of the Armored Cruiser USS Pennsylvania on January 18th 1911.  It was the British Royal Navy which first built and operated aircraft carriers beginning with the HMS Furious which had been converted from a light Battle Cruiser.  The Royal Navy would covert the sister ships of the Furious, the Glorious and Courageous as well as the auxiliary ship the Argus before building their first carrier that was designed from the keel up, the HMS Hermes.     With the British building carriers and the Japanese following suit the United States began a program of aircraft carrier production and operation unmatched in history.

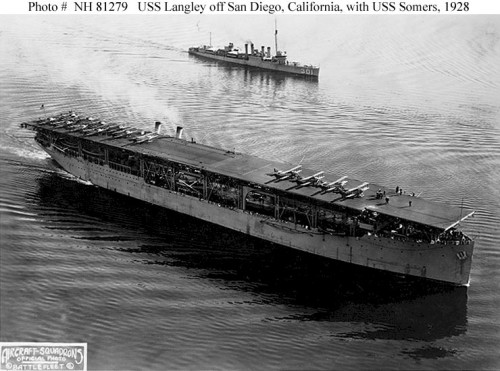
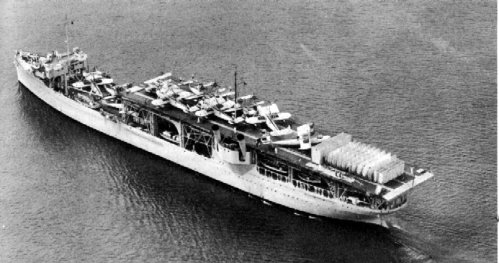
uss langleyUSS Langley CV-1 The “Covered Wagon”

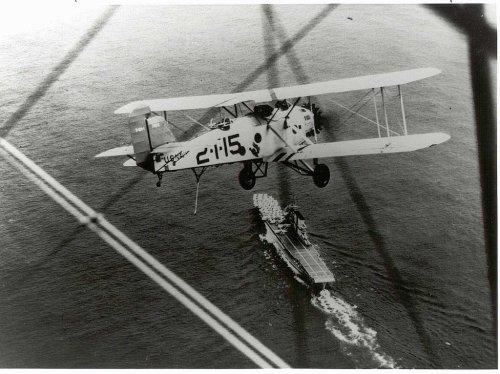
The first US carrier was the USS Langley, CV-1.  Langley was converted from the collier USS Jupiter beginning in July 1919.  She was commissioned as USS Langley CV-1 on 21 April 1920.  Displacing 15,150 tons fully loaded Langley embarked 34 aircraft and had a maximum speed of 15.5 knots.  Langley was primitive but groundbreaking.  She was the first carrier equipped with catapults and on 18 November 1922 achieved the first catapult takeoff by an aircraft.  She served as an invaluable training platform for Naval Aviators and helped provide the fleet with highly skilled flight crews that would operate from the USS Lexington and USS Saratoga.

langley as av-3Langley after conversion to AV-3

Nicknamed the “Covered Wagon” she served initially in the Atlantic until November of 1924 when she was transferred to the Pacific Battle Force.  She served as a carrier in the Pacific until 1936 when she was converted into a Seaplane Tender AV-3 and assigned to the Pacific in September 1939 based in Manila.  She was in the Philippines when the Japanese attacked and was sent south to Australia.  She was assigned to the ABDA forces defending the Netherlands East Indies and was sunk by her escorts after being bombed and disabled by Japanese aircraft while delivering fighter aircraft to Java with the loss of 16 sailors.

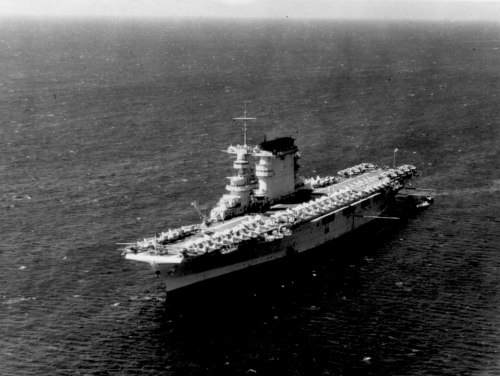
uss lexingtonUSS Lexington CV-2

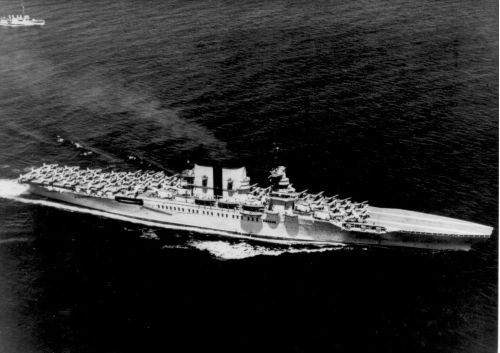
The second two American Aircraft Carriers were also conversions.  Unlike Langley the Lexington and Saratoga were converted from a new class of large and powerful battle cruisers whose construction had been canceled by the restrictions of the Washington Naval Treaty.  Commissioned on December 14th 1927 Lexington was 880 feet long and displaced 38,746 tons.  Saratoga was commissioned on November 16th of the same year and of similar dimensions and displacement.  Both of these ships could steam at 33.25+ knots and had a complement of 90 aircraft.  They were armed with eight 8” guns mounted in 4 turrets at the behest of more traditionally minded officers who felt that the armament might be needed for surface actions.

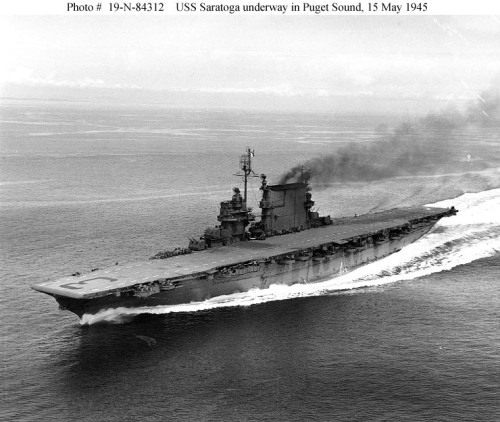
Saratoga underwayUSS Saratoga CV-3

They were the largest American carriers built until the Midway class appeared inin late 1945 and early 1946.  Of other nations pre-war carriers only the Japanese Navy’s Akagi and Kaga, converted from a battle cruiser and battle ship for the same reason as a the Lexington’s were comparable in size, air group capacity, protection and speed. Saratoga’s 8”battery would be replaced by twin 5” 38 caliber mounts in 1942.

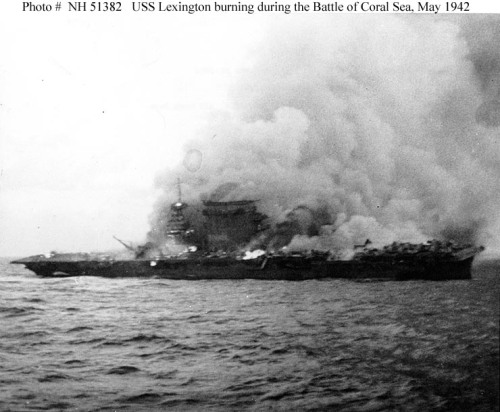
lexington sinkingLexington Burning and Sinking

Both ships were used to help develop carrier doctrine and the concept of the carrier task force. Future leaders of Naval Aviation including Marc A. Mitscher trained aboard or flew from these ships.  Of particular note was that during Fleet Problem XIX in 1938 Saratoga launched a surprise air attack on Pearl Harbor from a point 100 miles off Oahu, setting a pattern that the Japanese copied in December 1941.

saratoga 1945Saratoga 1945

During World War II both helped hold the line after Pearl Harbor along with Enterprise, Yorktown and Hornet. Lexington was the flagship of TF-11 during as series of raids on Japanese outposts in the Solomons.  TF-11 joined Admiral Frank “Jack” Fletcher’s TF-17 at the Battle of Coral Sea, the first Naval Battle fought outside of eyesight of the respective forces. Lexington’s aircraft helped sink the Japanese light carrier Shoho on May 7th 1942 and heavily damage the fleet carrier Shokaku the following day. However aircraft from Shokaku and Zuikaku hit Lexington with two torpedoes and 3 bomb hits which her damage control parties seemed to have under control when vapors from ruptured aviation fuel lines were ignited resulting in a series of explosions which ignited uncontrollable fires. Her crew was evacuated by escorts and she was torpedoed by the destroyer USS Phelps.

Saratoga served throughout the war. She engaged in patrols after Pearl Harbor and while enroute to joining Enterprise was hit by a torpedo from the Japanese submarine I-16. After repairs she was rushed to Hawaii to join the American Task Forces at Midway but arrived in Hawaii the day after the battle.  Following this Saratoga operated in the Central Pacific in the first offensive at Guadalcanal.  She participated in the landings as the flagship of Admiral Fletcher and then at the Battle of Eastern Solomons sank the Japanese light carrier Ryujo and damaged the seaplane carrier Chitose.  Following this battle she was hit by a torpedo from the I-26. After repairs she again went to the Solomons joined by the light carrier USS Princeton.  On November 5th the two carriers conducted a brilliant strike on Japanese ships and aircraft facilities at Rabaul which were threatening the landings at Bougainville.

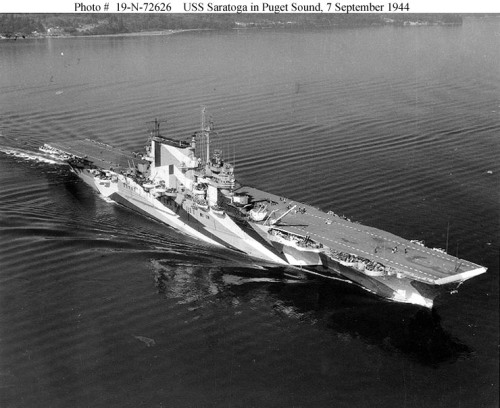
saratoga 1944Saratoga September 1943

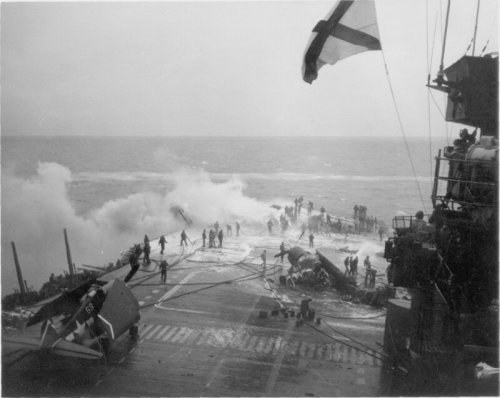
Following these operations Saratoga operated in the Gilberts and then with the British in the Indian Ocean.  She then was used as a training carrier for new pilots and aircrews at Pearl Harbor before being brought to Iwo Jima to operate night fighters against Kamikaze raids.  While conducting these operations she was attacked by Japanese aircraft in which 6 Japanese aircraft score 5 hits on her in 3 minutes.  Her forward flight deck was wrecked and she suffered great damage below decks and she lost 123 sailors.

saratoga kamikaze 2Saratoga burning after Kamikaze hits in 1945
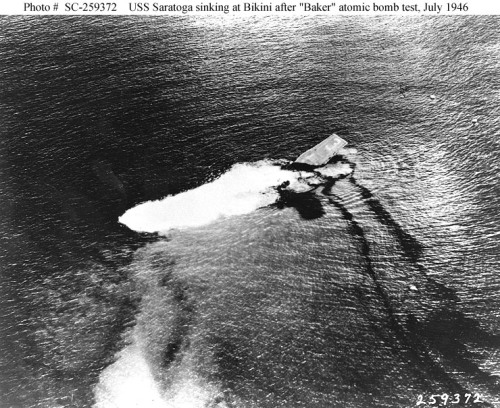
Following repairs she resumed training duties and after the defeat of Japan was involved in Operation Magic Carpet to bring Servicemen back from overseas.  Surplus to Navy needs at the end of the war Saratoga was sunk in Operation Crossroads at Bikini Atoll by an underwater atomic blast in the “Baker” bomb test a mere 500 yards from her position. She sank 7 hours later.

saratoga sinkingThe End of an Era- Saratoga goes down at Bikini

5 Comments

Filed under History, Navy Ships